Practo Ray is an easy Practice Management Software designed to help doctors focus on their patients. It offers various features that simplify all aspects of a doctor’s practice- right from appointment booking, patient record management to billing and follow up.
Using your account:
Once you have verified your account by clicking on the link sent to you on your registered email id, you can start experiencing the benefits of being a Practo Ray user.
To add new Doctors and Staff:
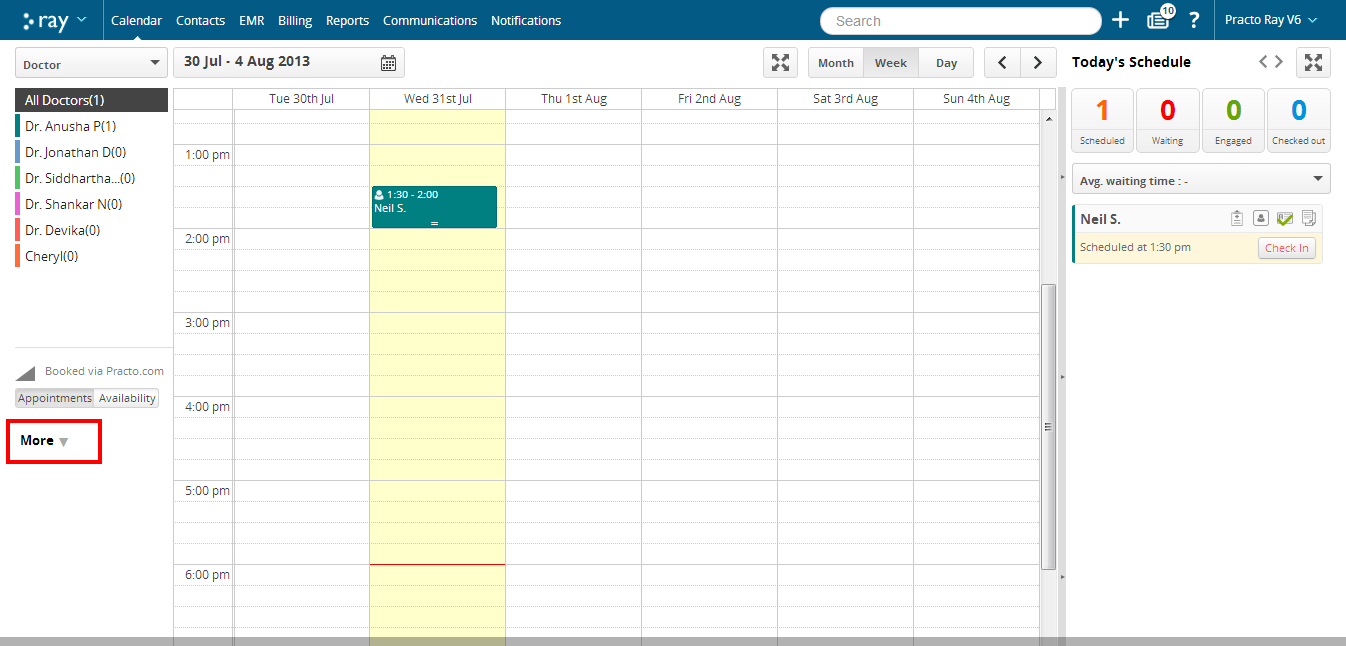
Log into your Practo Ray account. You will now be able to see your Calendar page. Click on the button- ‘More’ that is located at the bottom left on your Calendar page.
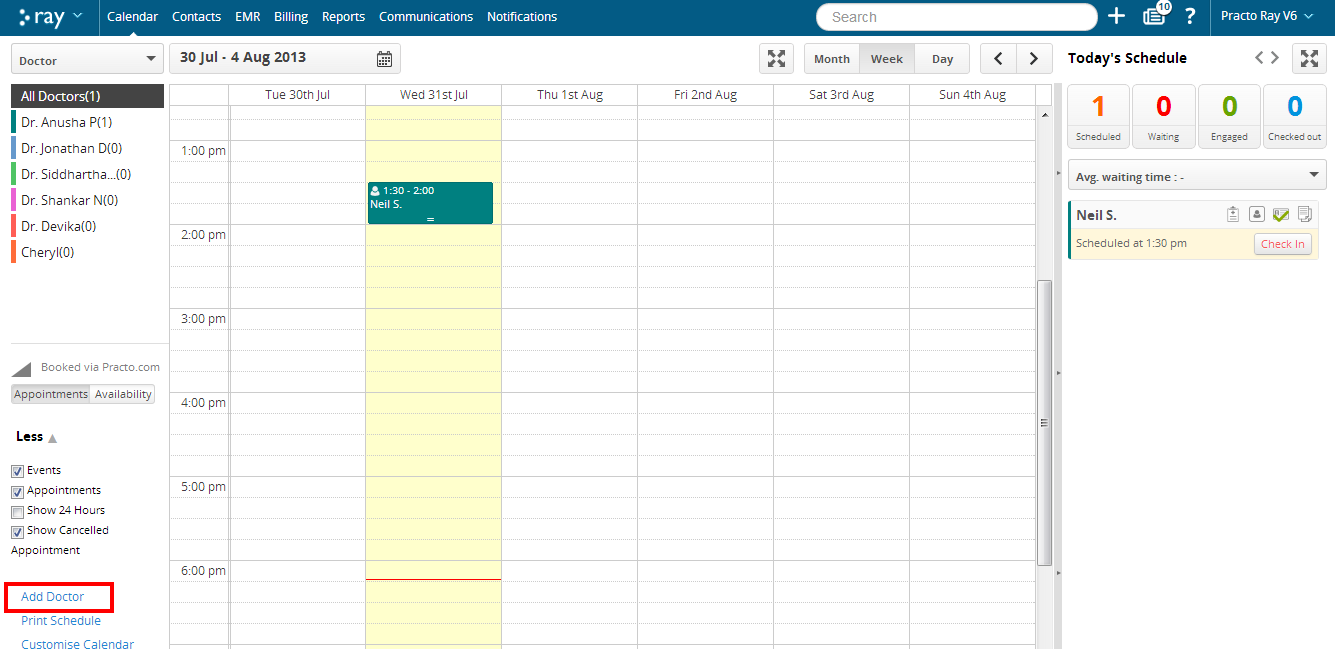
You will see a list of options in the drop down menu that appears. Click on ‘Add Doctor’.
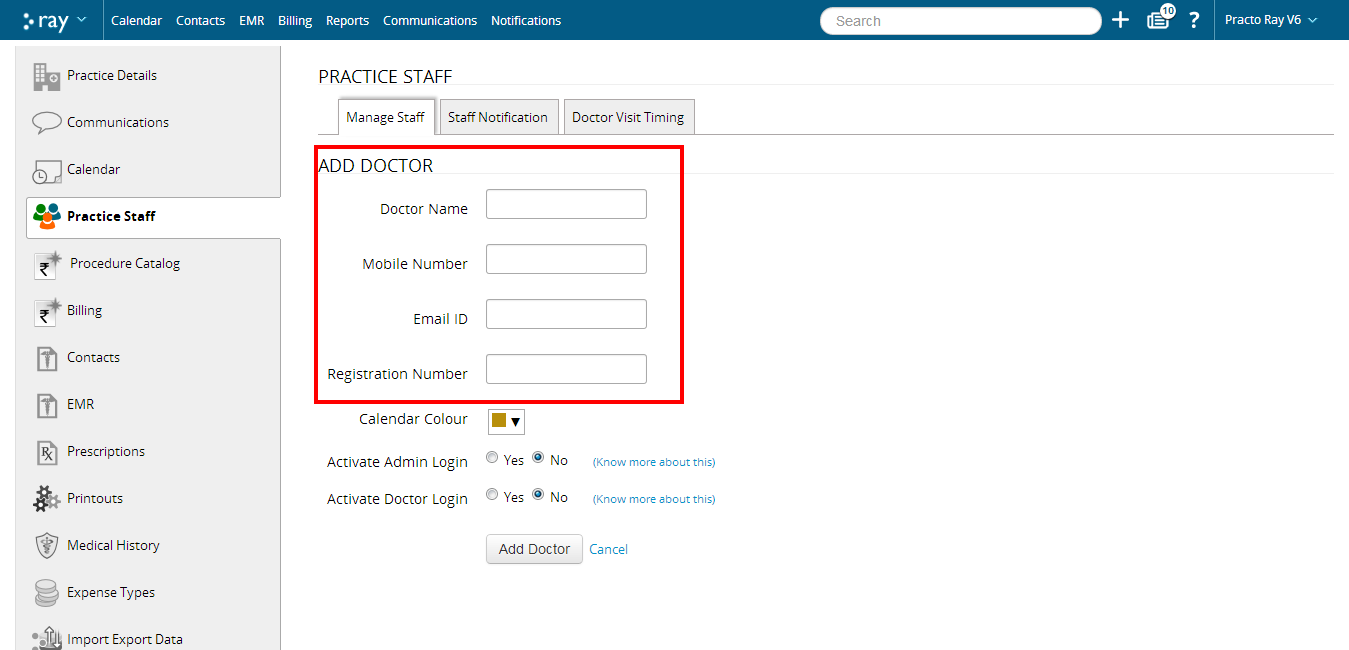
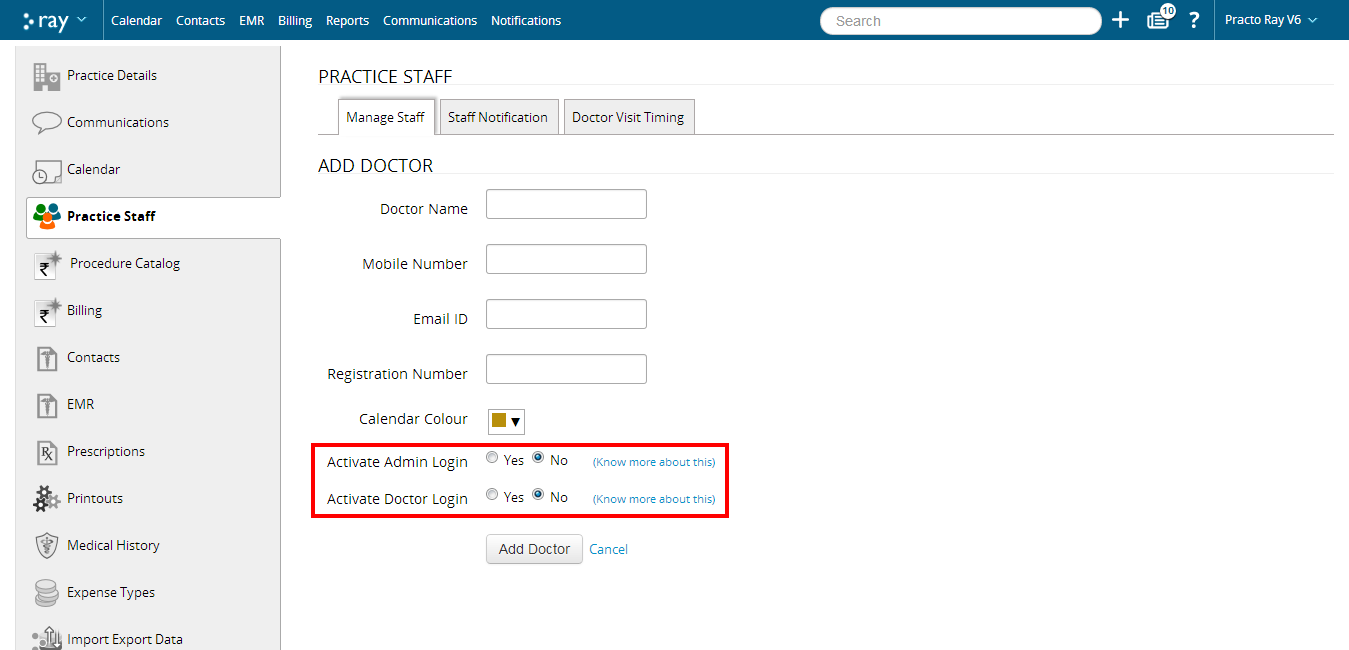
This will prompt you to a new page where you can specify the details of the new doctor.
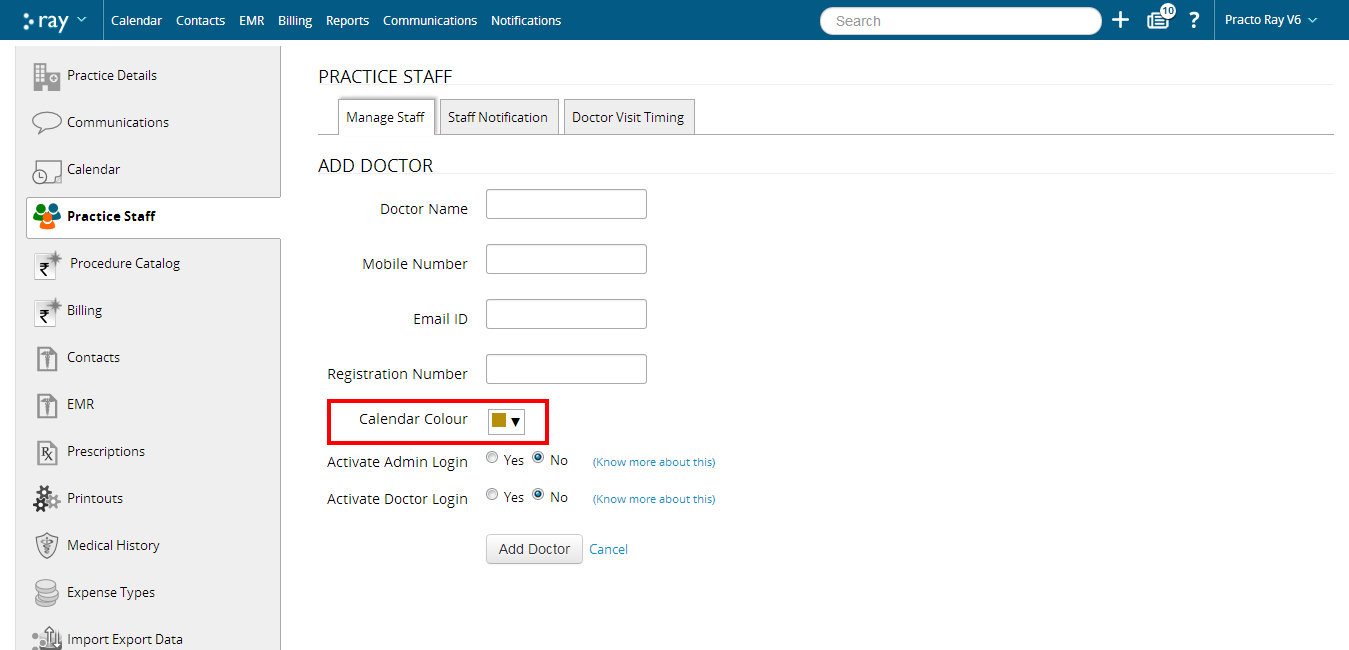
You can even assign a colour to your doctor that will help you differentiate between appointments for different doctors.
You can even decide whether or not to give the doctor Admin rights by selecting the appropriate option at this stage.
To specify clinic timings
Log into your Practo Ray account. Locate the name of your practice on the menu bar and click on it.
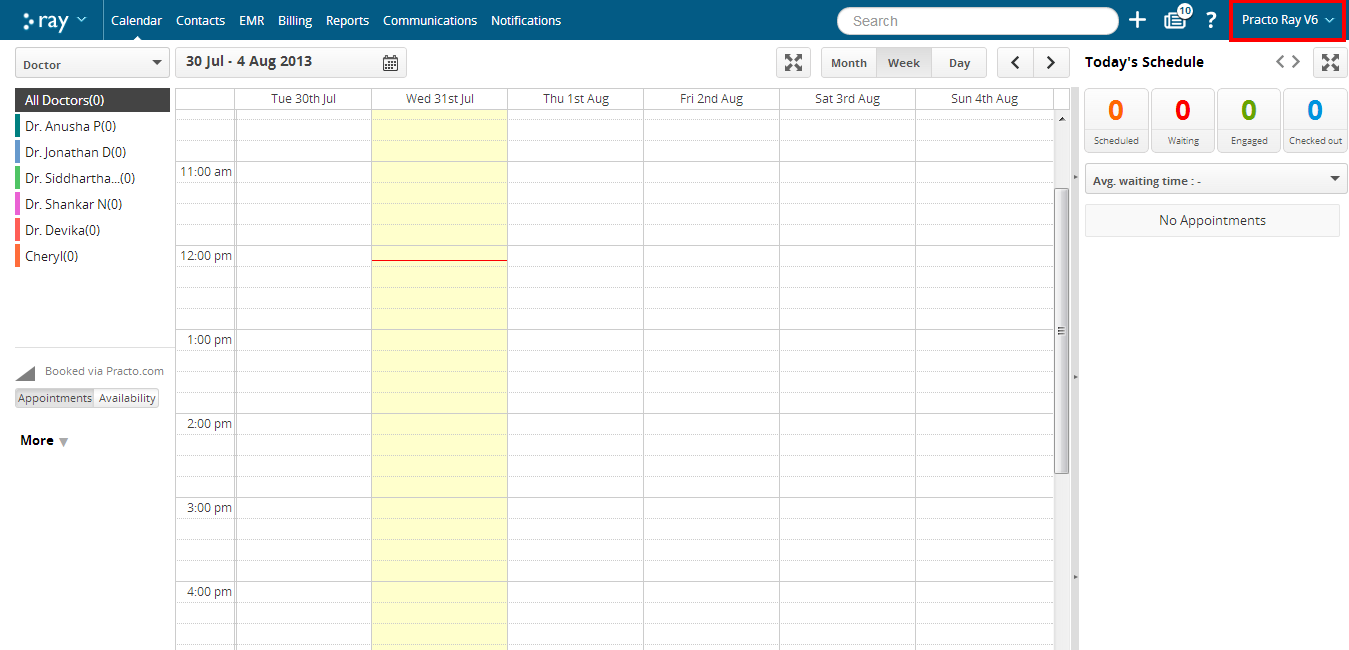
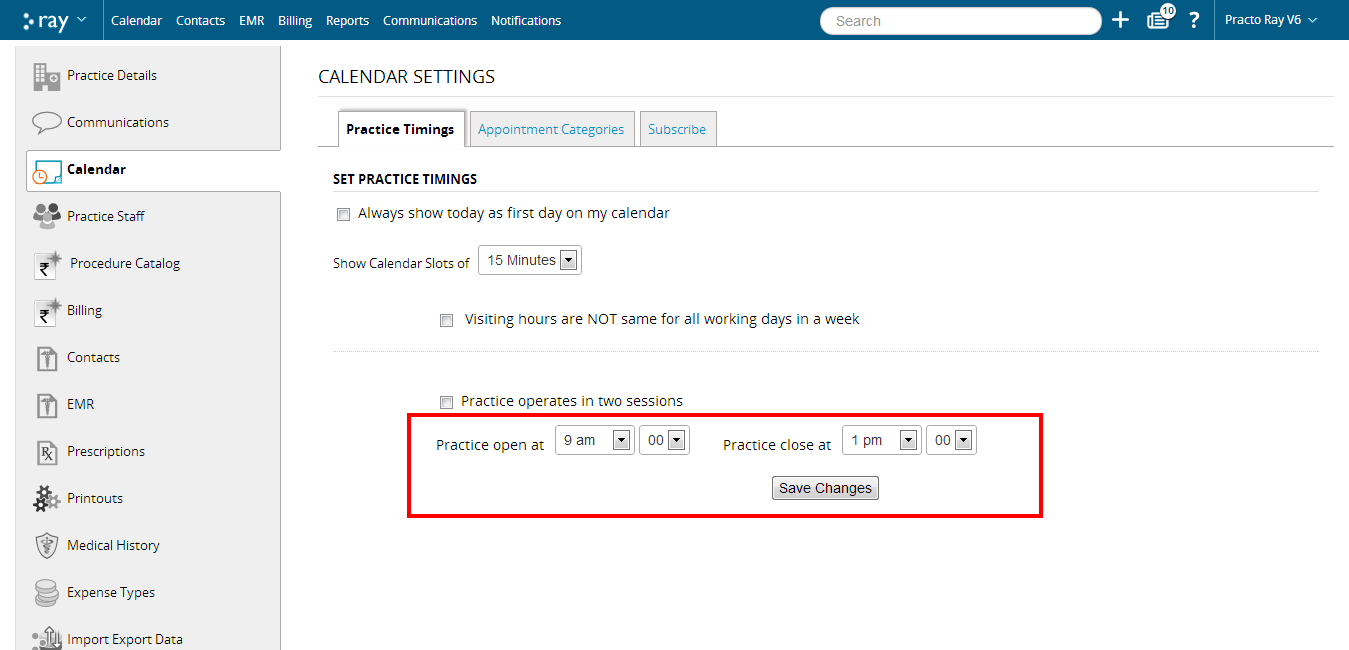
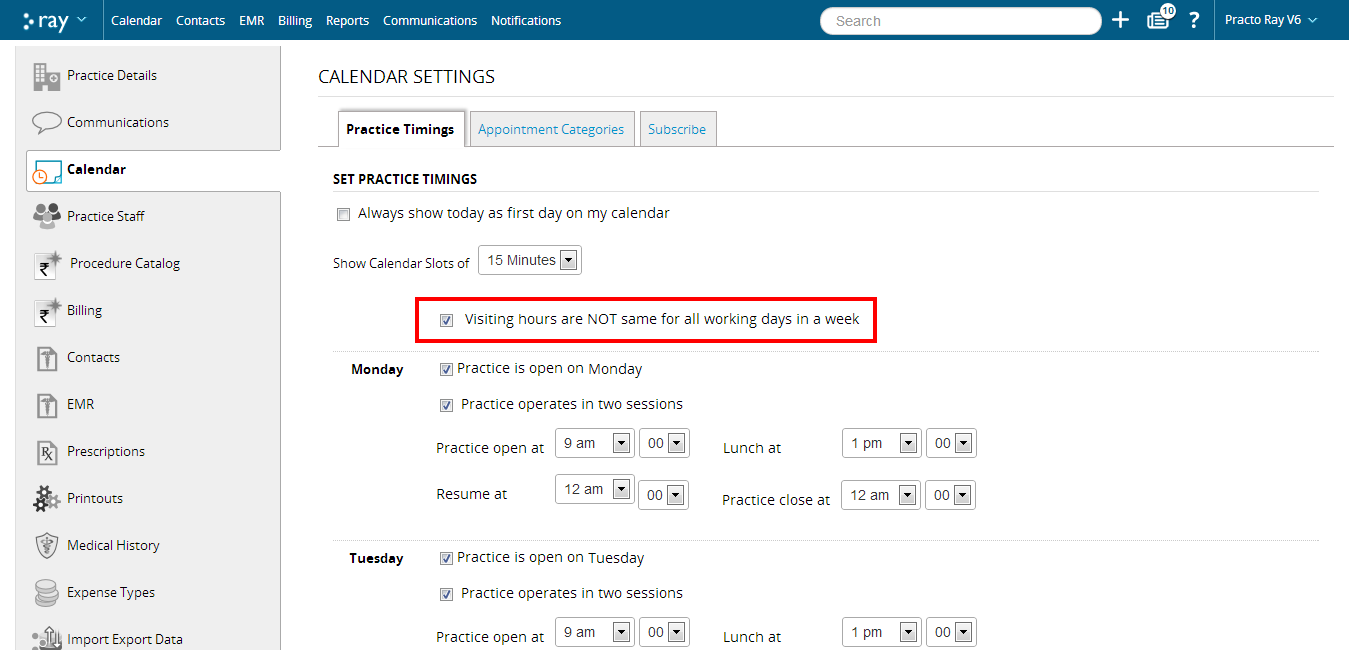
To set your clinic timings, click on ‘Calendar’ located on the left side menu on this page. This will take you to the Practice timings page where you can set the specific timings for your clinic.

If the clinic operates only one session throughout the day and week, select the appropriate timings and click on ‘Save changes’
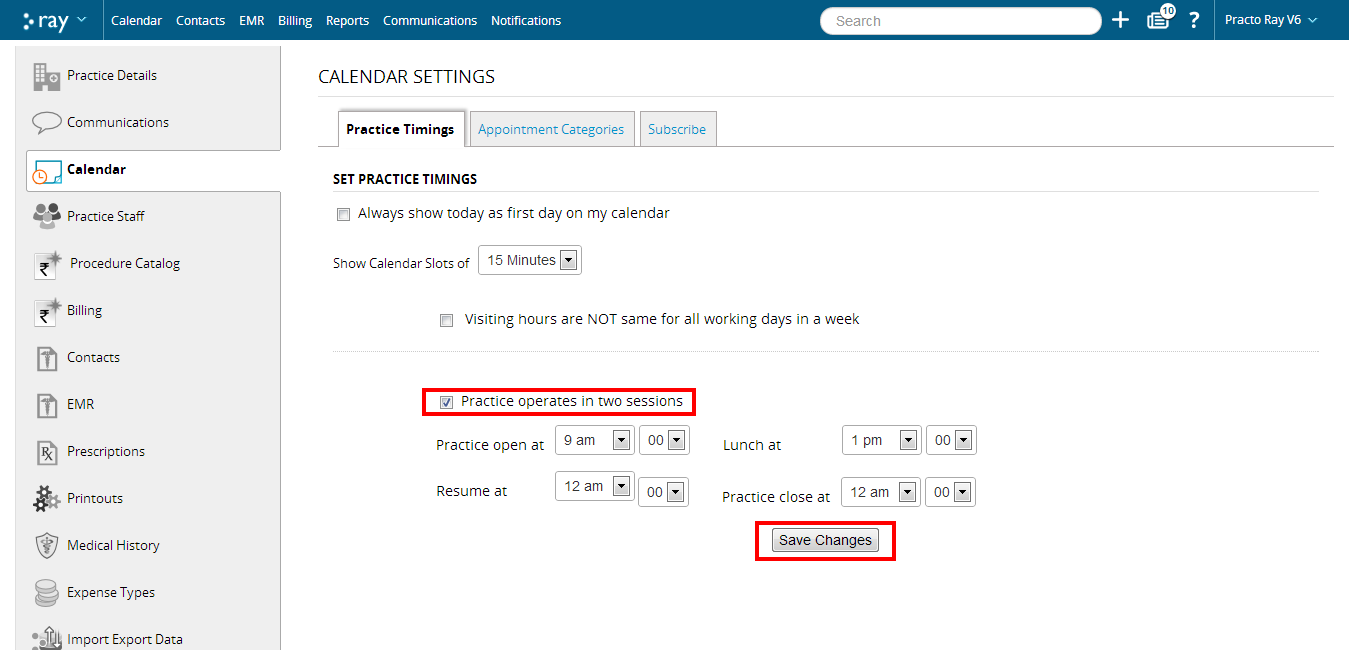
If the clinic operates two different sessions through the day, check the option that states ‘Practice operates in two sessions’. This will give you the option to select the time slots for both the sessions. Once you have entered the timings, click on ‘Save changes’
If the visiting hours are not the same for the entire week, check the option on the page. This will open up a new page which displays all days of the week. Select the appropriate timings for each day of the week and click on ‘Save changes’
To add a new patient:
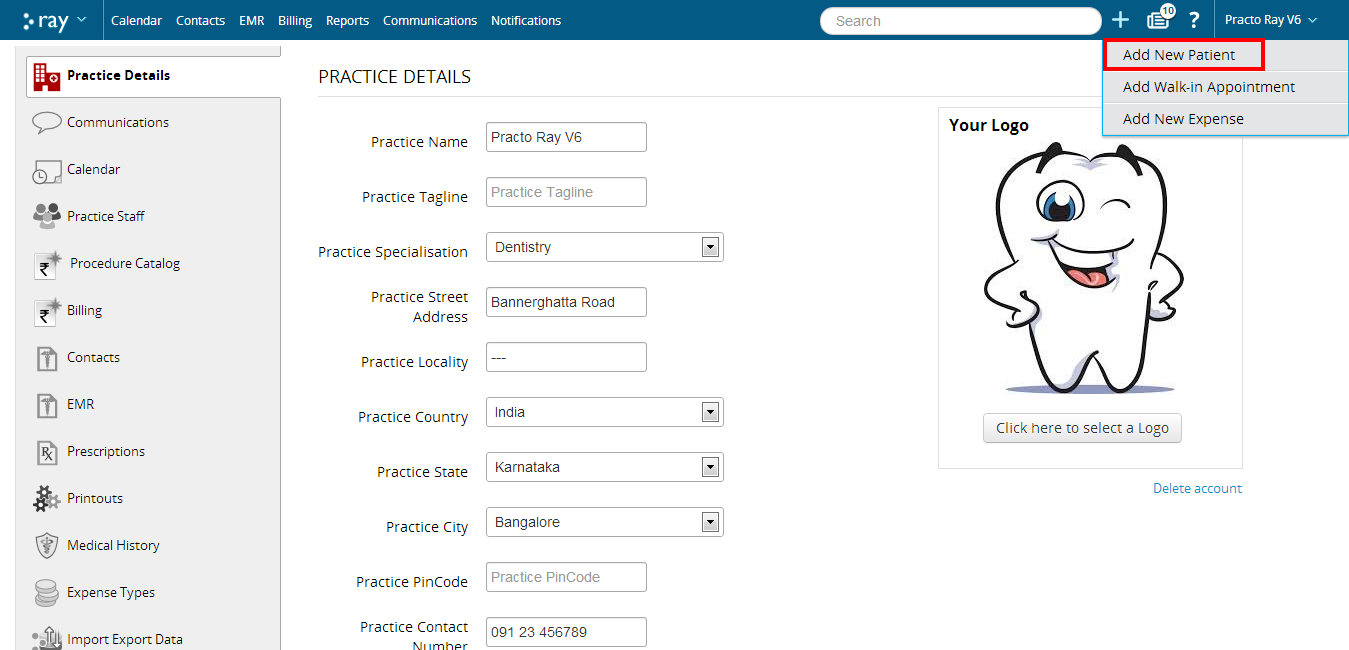
Log into your Practo Ray account and click on the ‘+’ symbol on the menu bar.
![]()
Select ‘Add new patient’ from the dropdown that appears.
This will take you to a new page where you can fill in the specifics for the patient. Ensure that you capture at least one unique identification number for the patient such as his phone number or Aadhaar ID number so that you can search for him/ her later on.
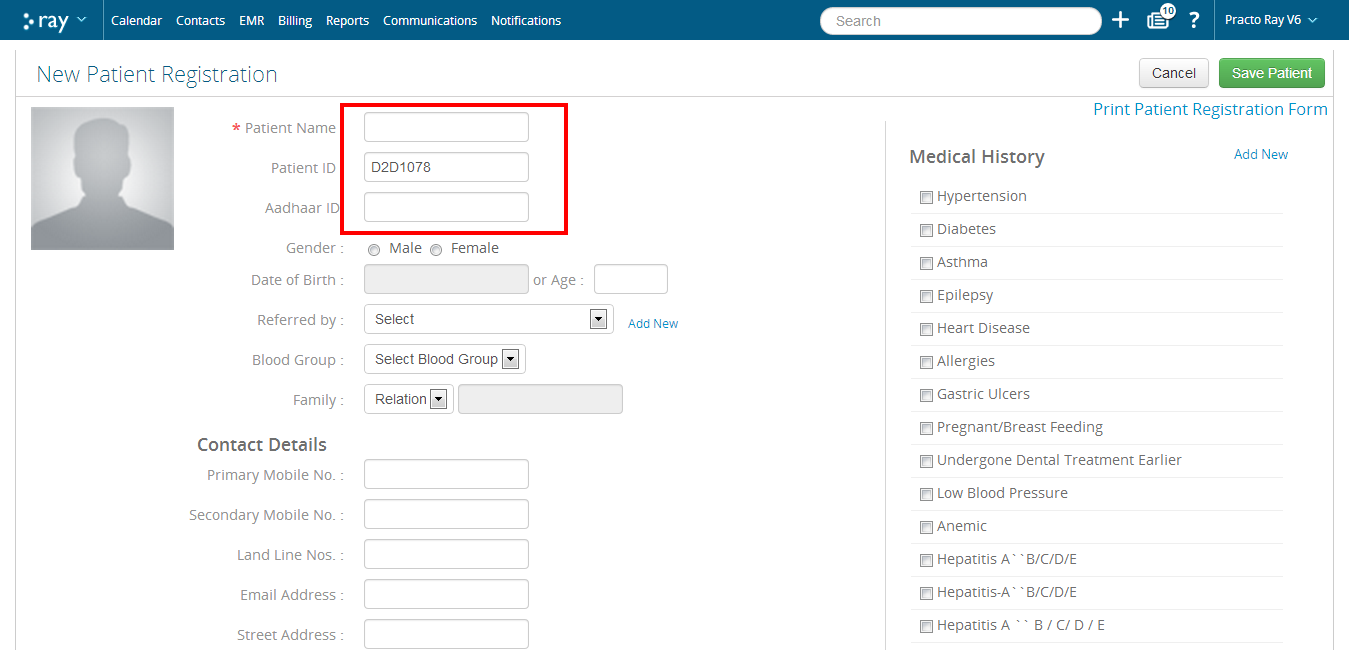
Once you have filled in the basic details you can specify their medical history by choosing the options that are provided on the right side of the screen.
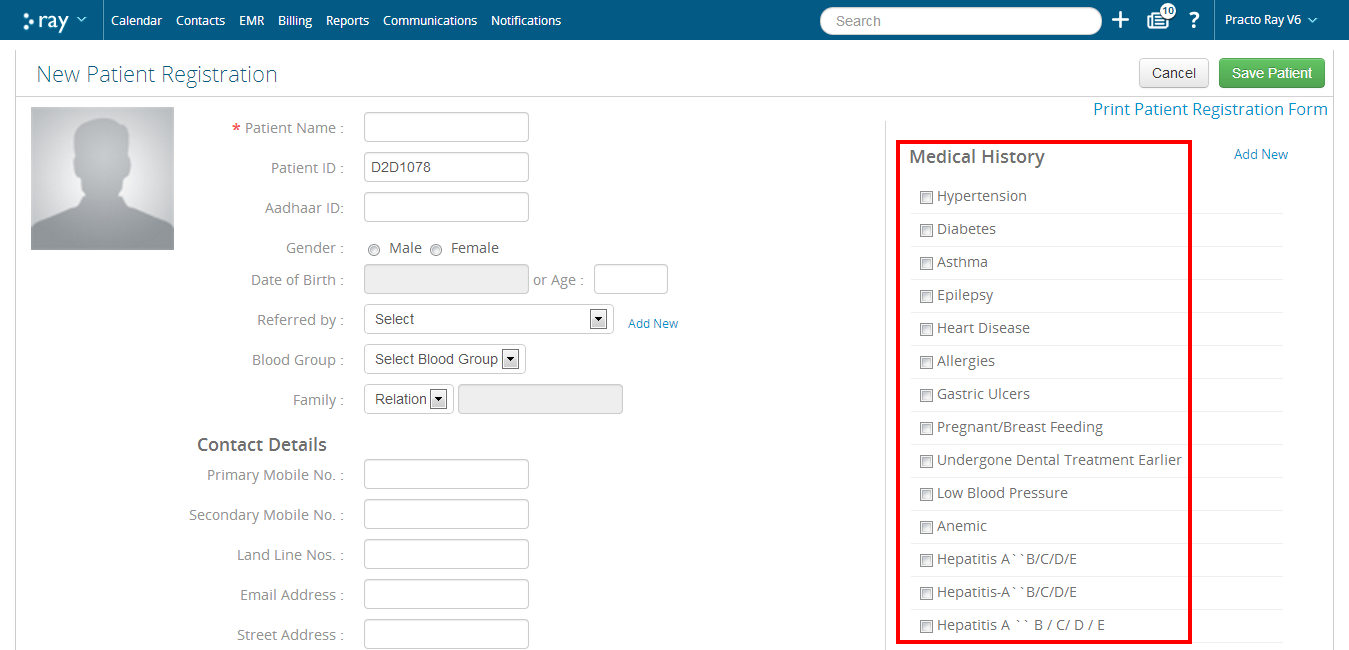
In case you need to add something that is not included in the list, you can add it and save it as well. This will now appear in your list.

Adding Patients to Groups:
Here, you have an additional feature that allows to to add your patients to groups. Groups help differentiate your patients so that you can organize them better.
To add a new patient to a particular group,select the group that you want to add them to by checking the appropriate box on the right side of the screen on the new patient details page.
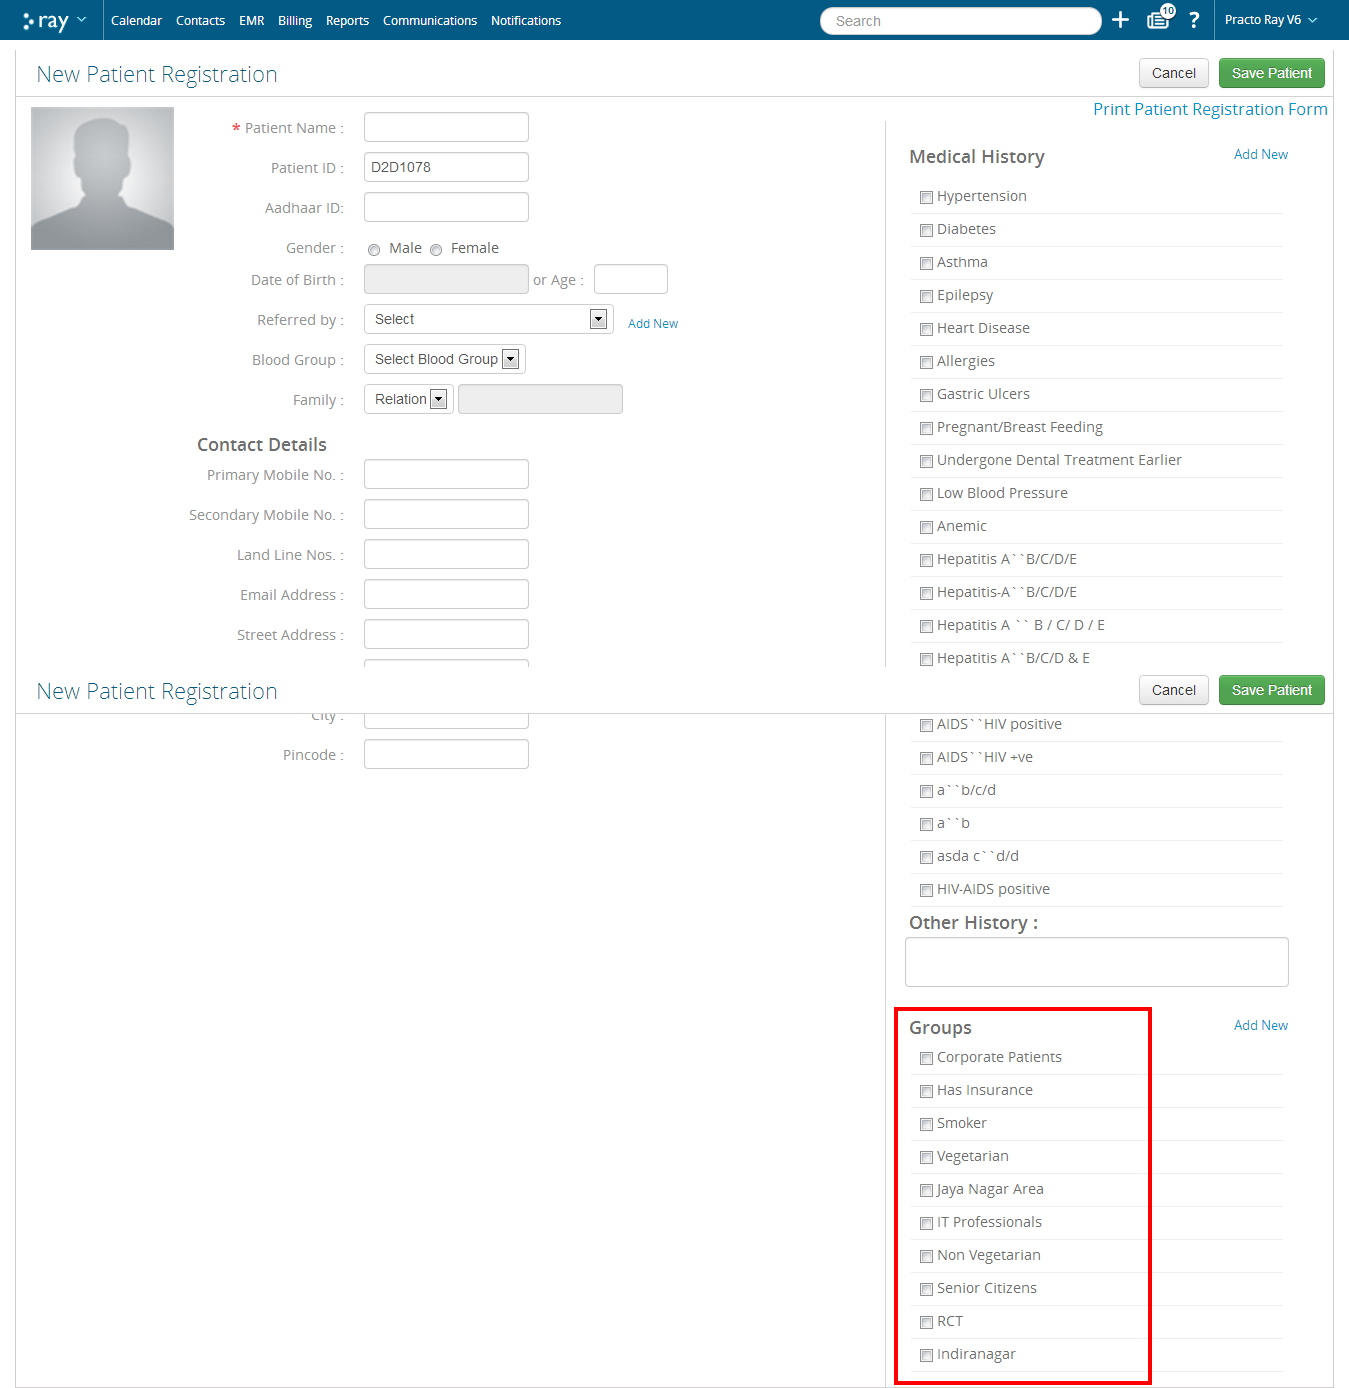
In case you want to add a new group, click on ‘Add New’ located under the ‘Groups’ heading to create it. Once you enter the details for a new group it will be visible for every new patient record you create from there on.

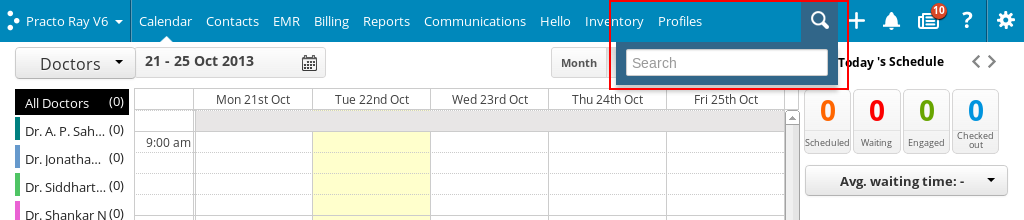
Searching for patients:
To search for patients, click on the search bar located on the menu bar. You can search for patients using multiple criteria:
- Patient name: Enter the patient’s name in the search bar. Select the patient and press enter to go to that patient’s profile
- Patient contact number: You can search for patient’s using their contact numbers as well
- Aadhaar ID: Patient Aadhaar ID’s can be used as a search criteria as well
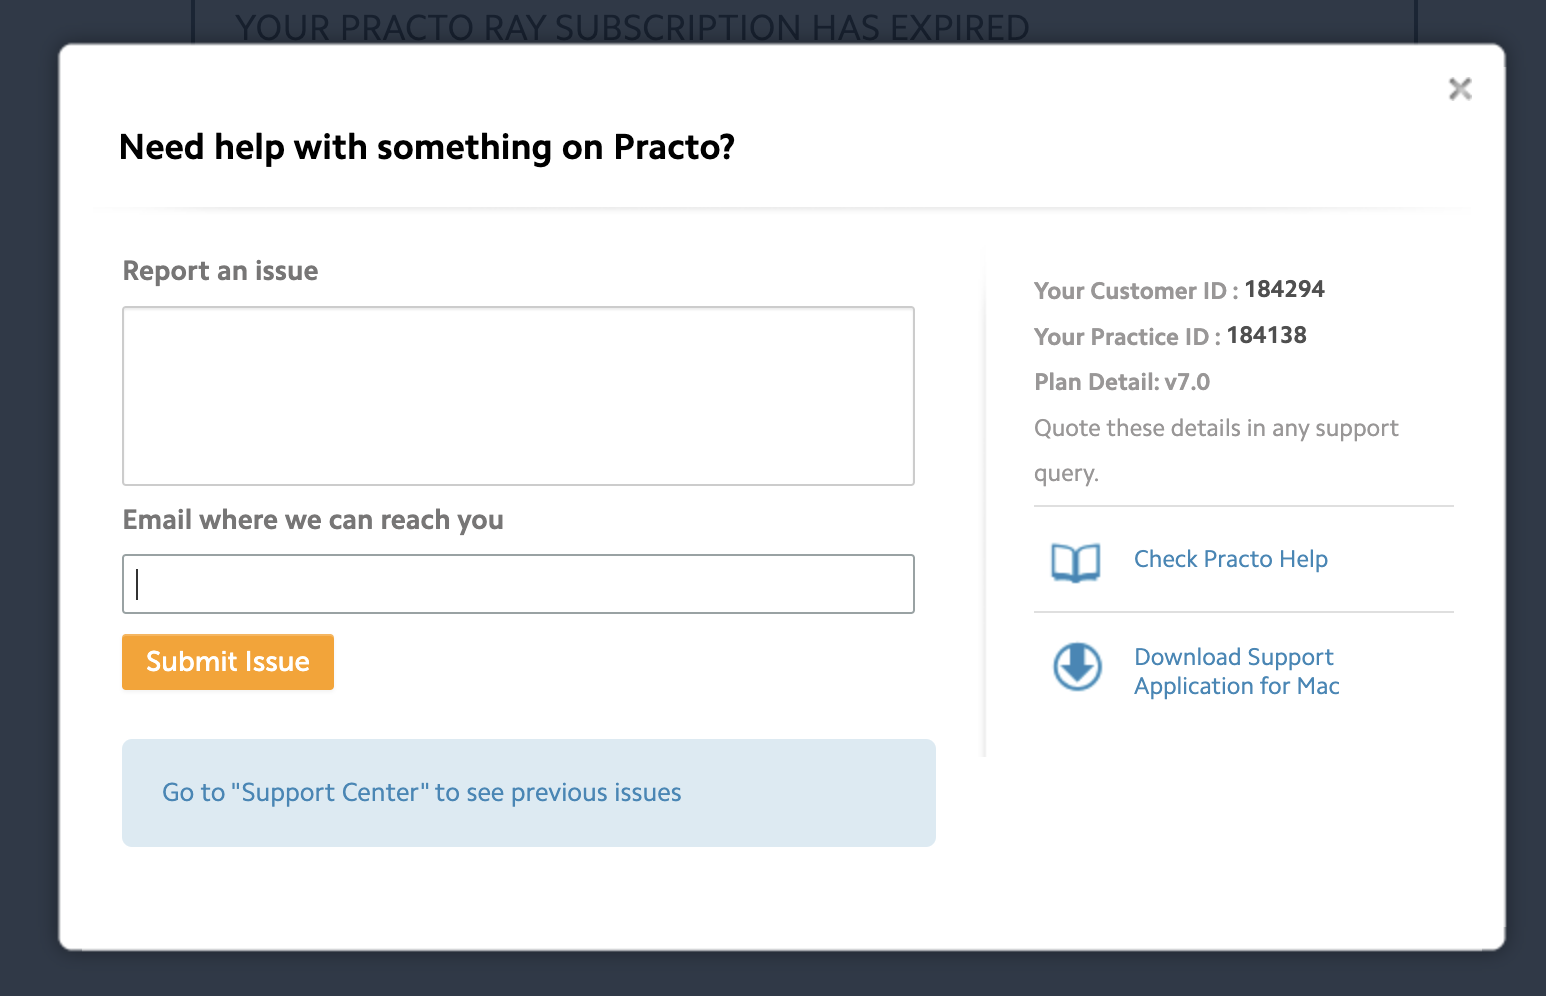
Contacting Support:
In case you get stuck with your Practo Ray account at any point and you can’t find a solution on support.practo.com, we’re here to help you. You can reach out to the support team for any issues you might be facing and someone from our customer support team will get back to you.
To contact the support team, click on the ‘?’ symbol on the menu bar.

It will prompt you to a page where you can post your query
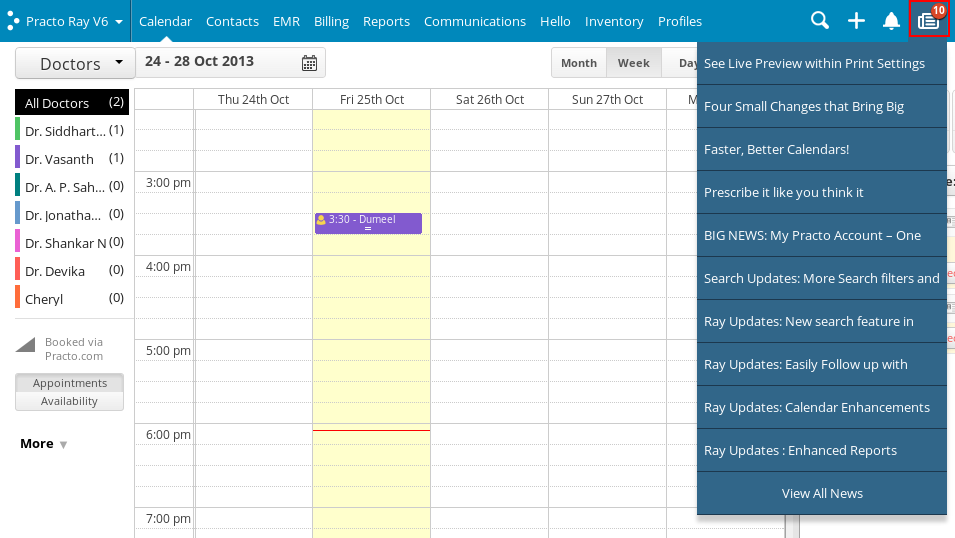
Knowing what’s new in Ray:
You can read all about our product updates by clicking on the ‘Product News’ button located on the menu bar. This allows you to see all the new articles on product features or enhancements that have recently been carried out.
Syncing information:
All the data entered in your Practo Ray account is automatically synced so that it is available across platforms- mobile, tablet, laptop or desktop.
Auto ID Generation:
You can automatically generate identification numbers for new patients and new bills that are added to your Practo Ray account. This function is enabled by default when you create your account.
In order to view this function, click on the Settings icon on the top-right corner. You will see a drop down menu, click on ‘Settings’ here.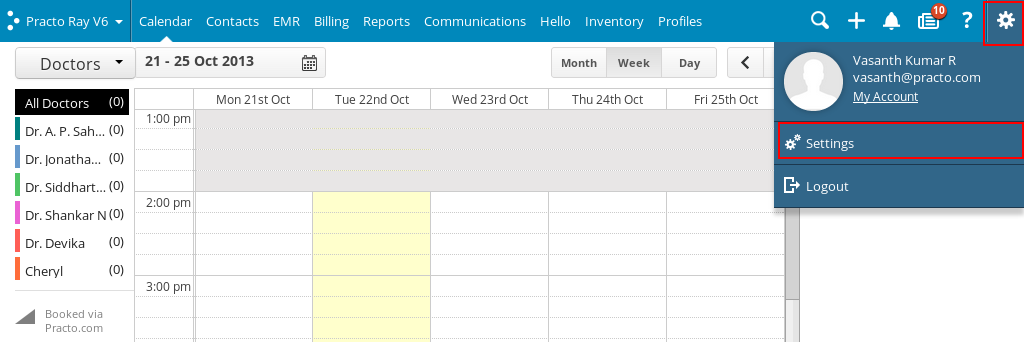
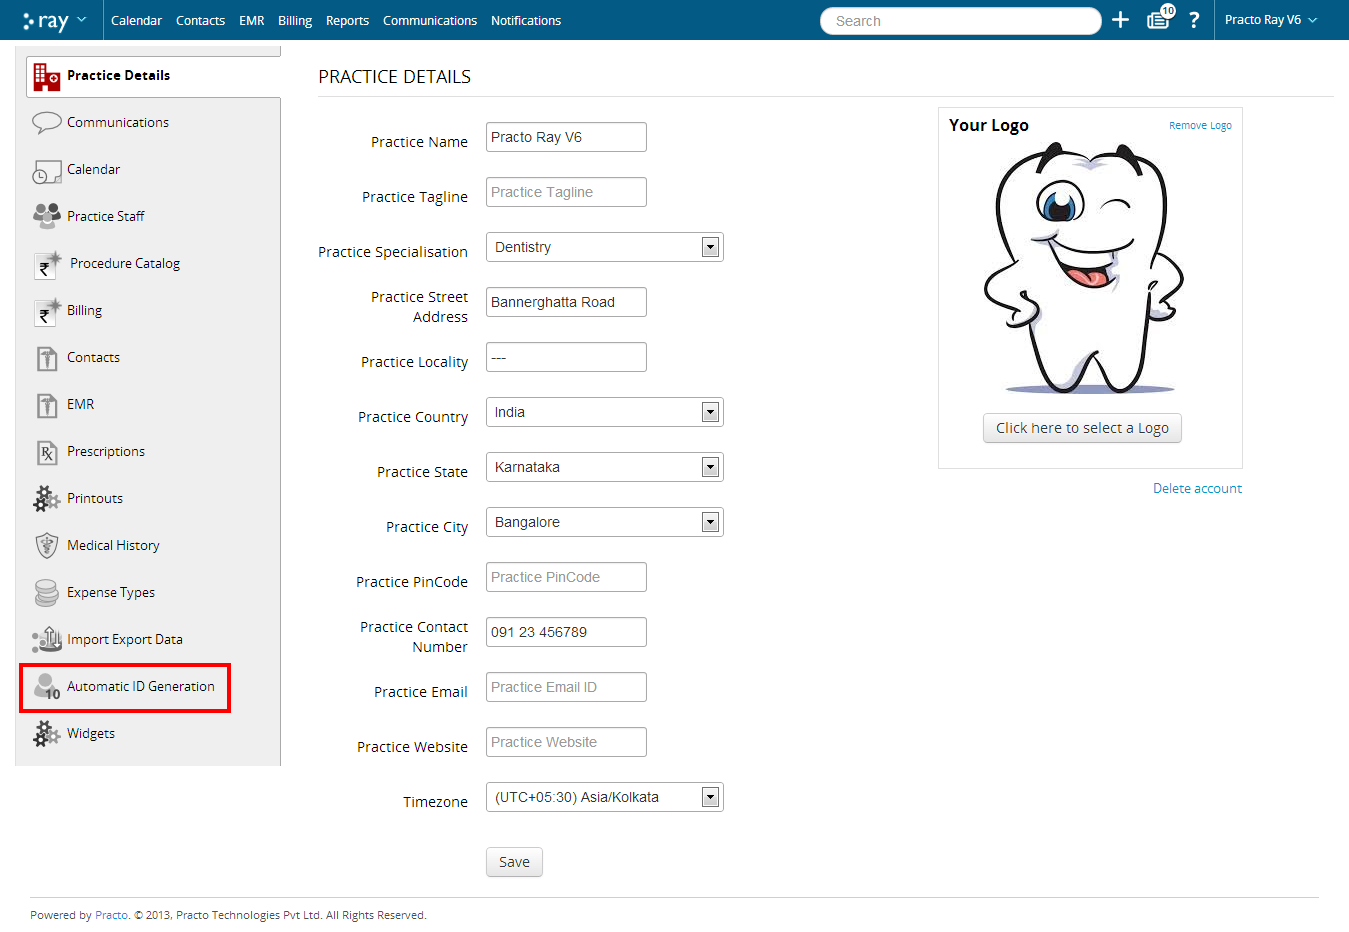
Once you have reached the ‘Settings’ menu, click on ‘Automatic ID Generation’ which is one among the options located on the left side of your screen.
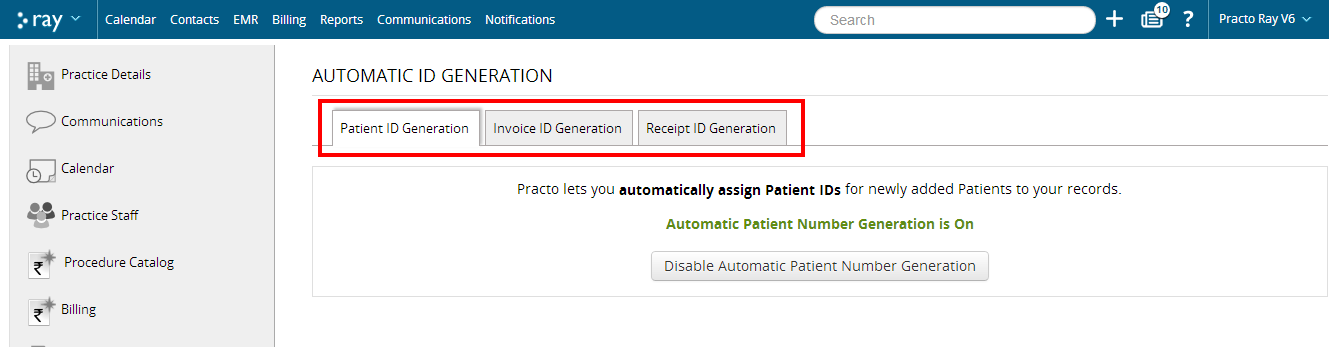
You will be directed to a new page that gives you the option to generate 3 kinds of ID’s- Patient ID’s, Invoice ID’s and Receipt ID’s.
-
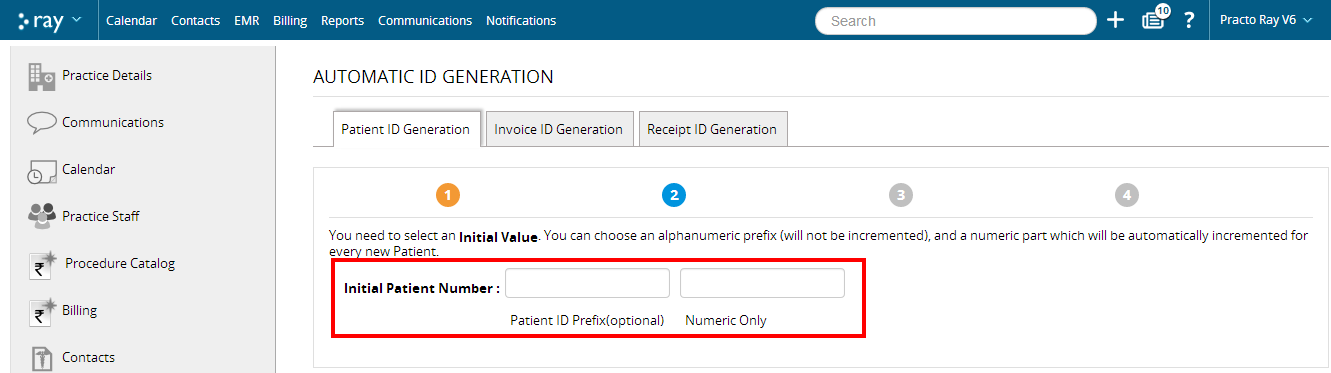
Patient ID: To activate automatic Patient ID generation, click on the tab ‘Patient ID Generation’ and select the ‘Activate Automatic Patient Number Generation’ button. This will prompt you to select an initial value that will then be incremented for every subsequent patient there on. You also have the option to assign a constant prefix that will automatically be part of every bill number. Choosing a prefix helps you to maintain a level of uniformity for all your records. A prefix once chosen, will remain the same for all patients and only the numeric value will be automatically incremented for every new patient.
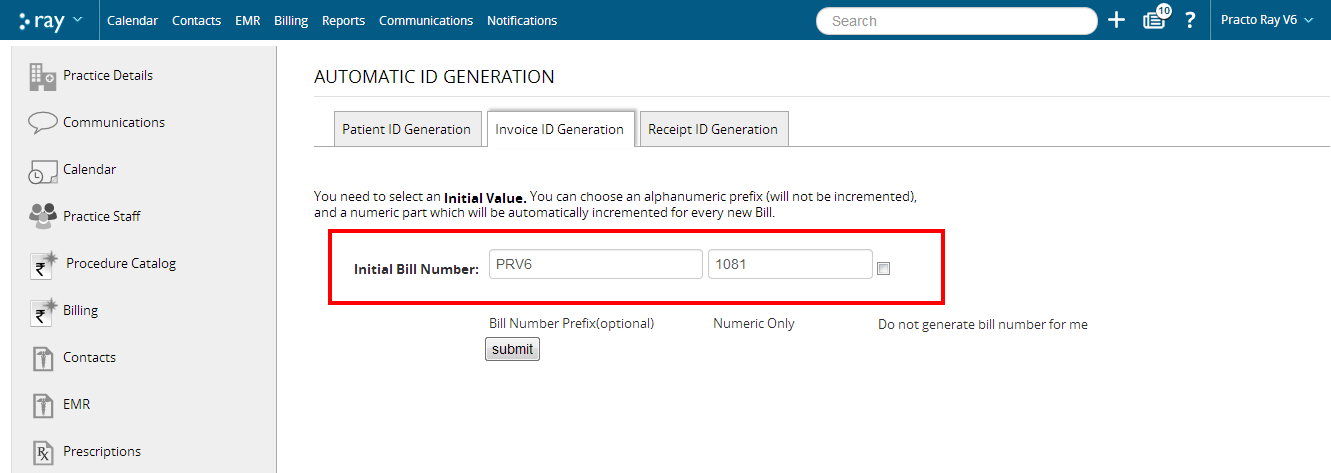
- Invoice ID: To activate automatic Invoice ID generation, click on the tab ‘Invoice ID Generation’. This will prompt you to select an initial value that will be then incremented with every new patient. You can choose a prefix that will remain the same for every bill and the subsequent bill number will be automatically incremented for every new bill.In case you do not want invoice ID’s generated for your patients, you can uncheck the option ‘Do not generate bill number for me’.
-
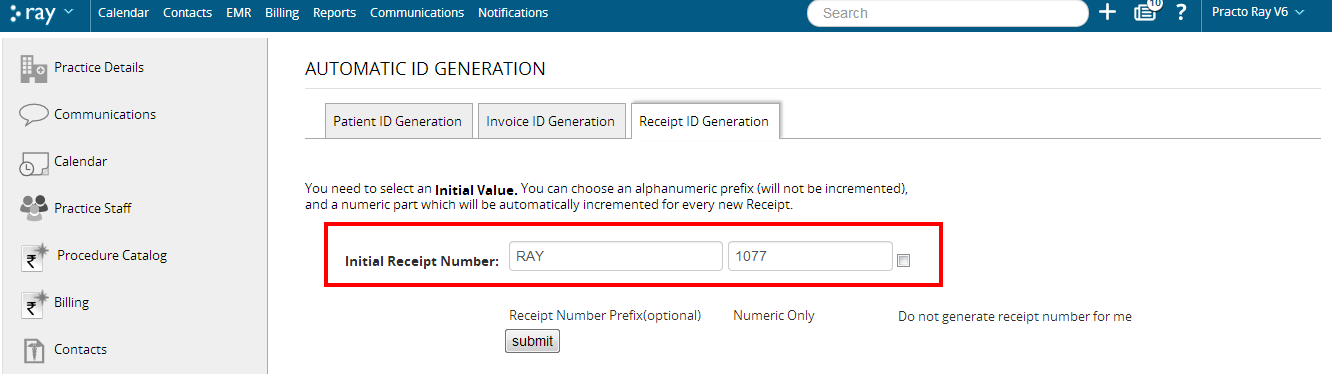
Receipt ID: To activate automatic Receipt ID generation, click on the tab ‘Receipt ID Generation’. This will prompt you to select an initial value that will be then incremented with every new patient. You can choose a prefix that will remain the same for every receipt and the subsequent receipt number will be automatically incremented for every new receipt. In case you do not want receipt ID’s generated for your patients, you can uncheck the option ‘Do not generate receipt number for me’.
Managing multiple clinics under your Practice:
Once you have used Practo Ray at your clinic and realised how it simplifies your practice, you can use them in your other clinics as well.
If you run multiple clinics across your practice, you can add them to your main account by opting for a new practice. Once you add a new practice, you will start a new subscription for that practice from that specific date.
To add a new practice:
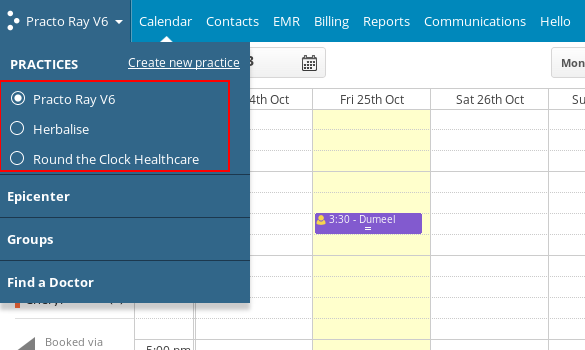
Log into your Practo Ray account and locate the name of your practice on the left side of the menu bar. Click on the drop down and select ‘Add new practice’.

It will prompt you to another page where you can fill the name for your new practice along with the phone number.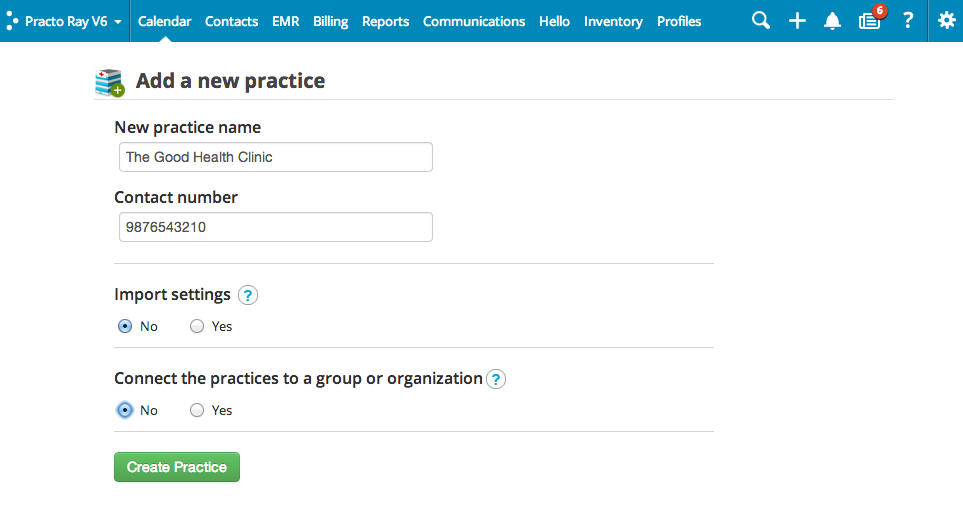
If you want to to import settings from your previous practice, check Yes in Import Settings and select the practice from which you want to import the settings.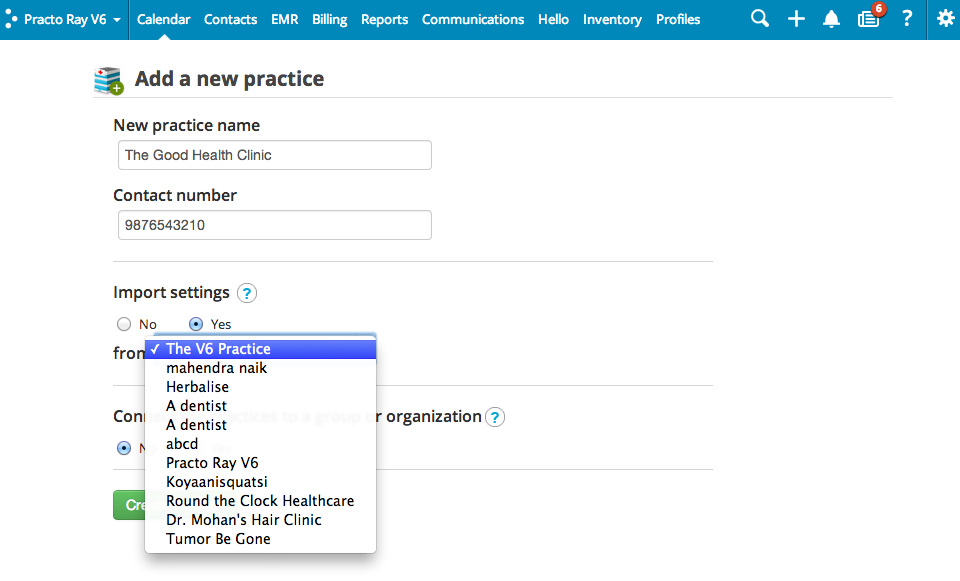
What Settings get imported when I add a new practice ?
After you click on Yes in Import settings, these settings will get imported to your new practice:
- Calendar Settings
- Treatment Settings
- Expense Settings
- Medical History
- Clinic Details
- Email Templates
- Print Settings
Switching between your clinics:
To view the activities in your other clinics click your practice name located on the menu bar. This will give you a drop down menu from where you can select the clinic that you want to view. Once you click on its name you will be prompted to the Practo Ray account for that particular clinic.
Linking your clinics:
You can even link all your clinics to your parent organization on Practo Ray. This will allow you to view the entire calendar for all your clinics at the same time.
- In order to do this, log into your Practo Ray account and locate the name of your practice on the menu bar. You will now be able to see a drop down menu with a list of options. Select the option to ‘Add new practice’ from this drop down.
- This will take you to a new page where you will be prompted to fill in the details for your new practice. Enter the name of your new practice as well as the contact number.
- There are two options available on this screen. The first option allows you to import settings from your previous practice.
- The second option allows you to connect your practice. In case you want to link your clinics, check this option.
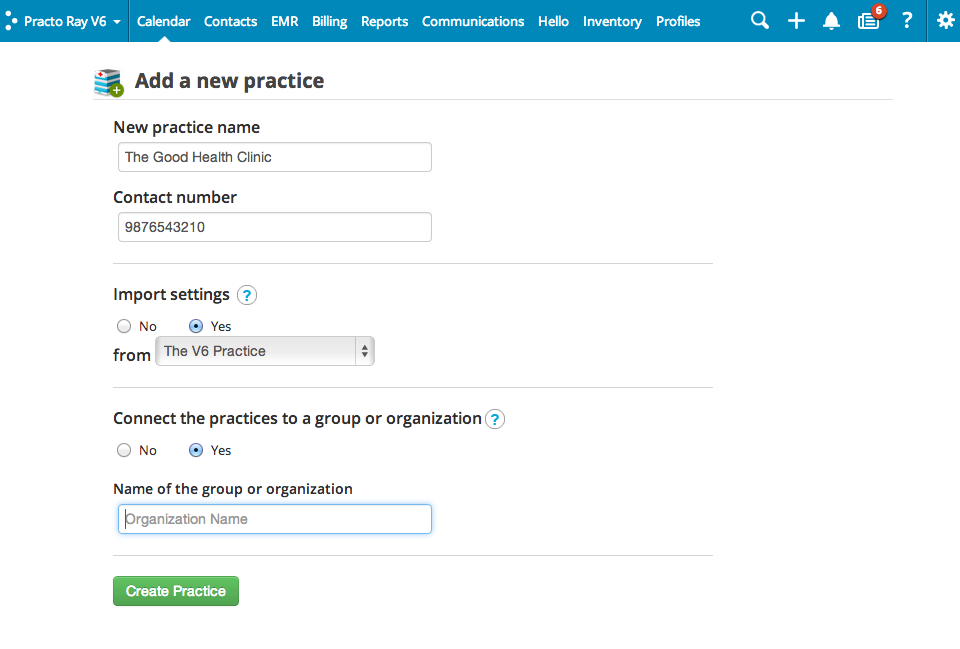
- When you select this option, it will prompt you to fill in your Organization Name. This name acts as the umbrella under which all your clinics would fall. Enter the name that you want to use as your Organization name and click on ‘Create Practice’.
- You have just created a new clinic under your main practice and will take you to the calendar page for the new practice. This will also start a new subscription plan for your new practice.
- In order to view all your clinics under that practice, go back to your drop down menu located on the right side. Click on the ‘Organization Name’.
- You will now be able to see the calendar for all the clinics that fall under that particular organization name.

Change your account password
You can change the password for your Practo Ray account at any time.
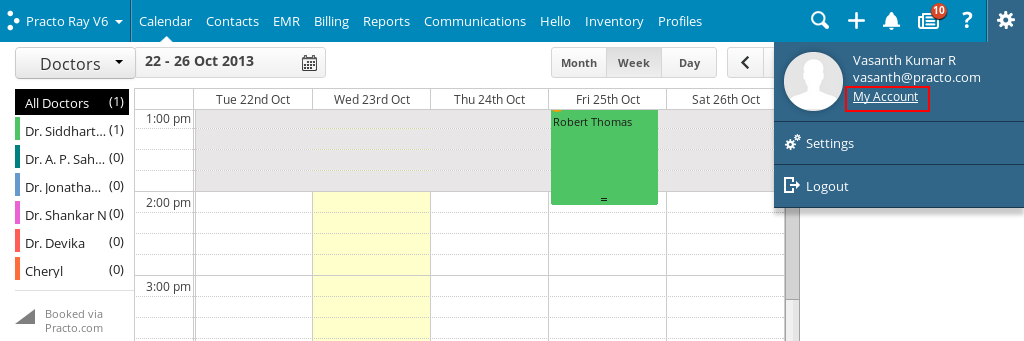
To change the password, click on the Settings icon on the top-right corner. You will see a drop down menu, click on ‘My Account’ here.
You will be taken to your accounts page. Select the option to ‘Change password’ by clicking it.
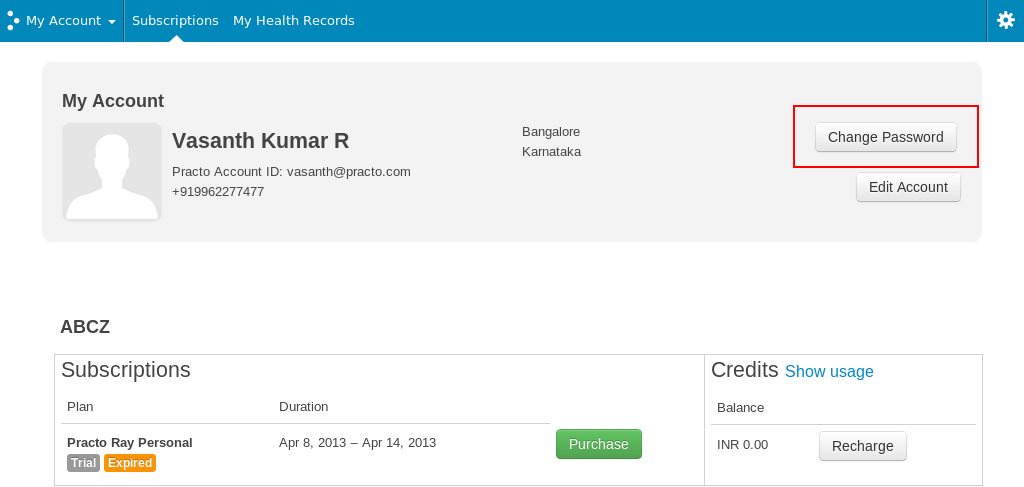
You will be prompted to a new page where you are requested to key in your previous password as well as the new password.
Once you confirm your new password click on the ‘Change password’ button.
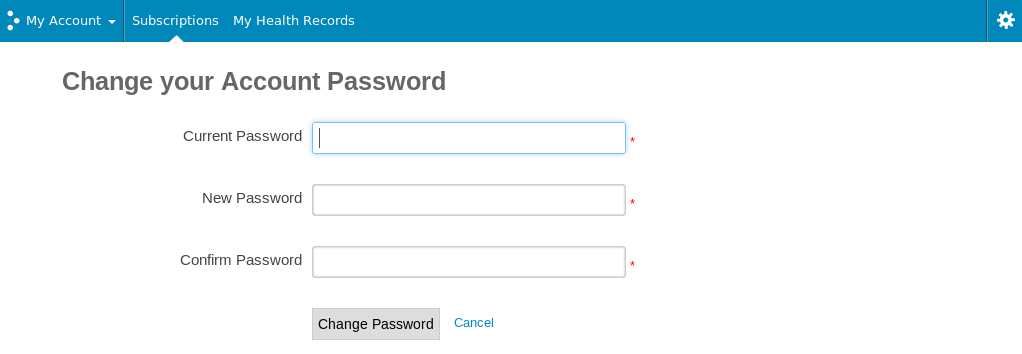
You have now successfully changed the password for your Practo Ray account.
Editing details for Doctors/ Staff
To change or update any details for the staff employed at your clinic,click on the Settings icon on the top-right corner. You will see a drop down menu, click on ‘Settings’ here.
This will take you to a new page with details of your practice. Click on ‘Practice Staff’ located on the left side of your screen to view the details for all your doctors and staff.
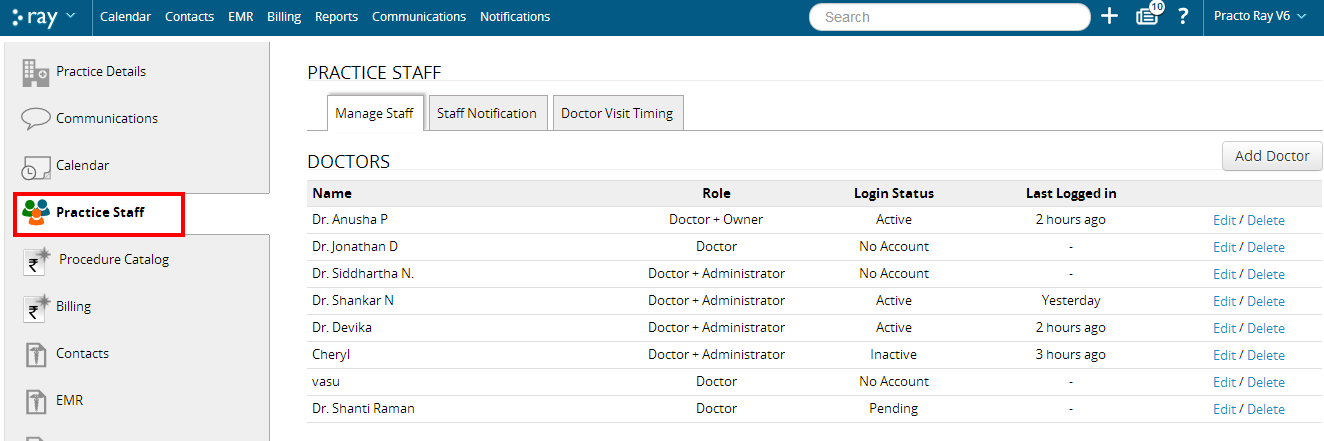
You can even edit details or delete doctors/ staff from this page.

You even have the option to select the kind of communication you want to send out to the doctors and staff employed at your clinic. Click on the ‘Staff Notification’ tab to view all the communication that is currently being sent out to each doctor.

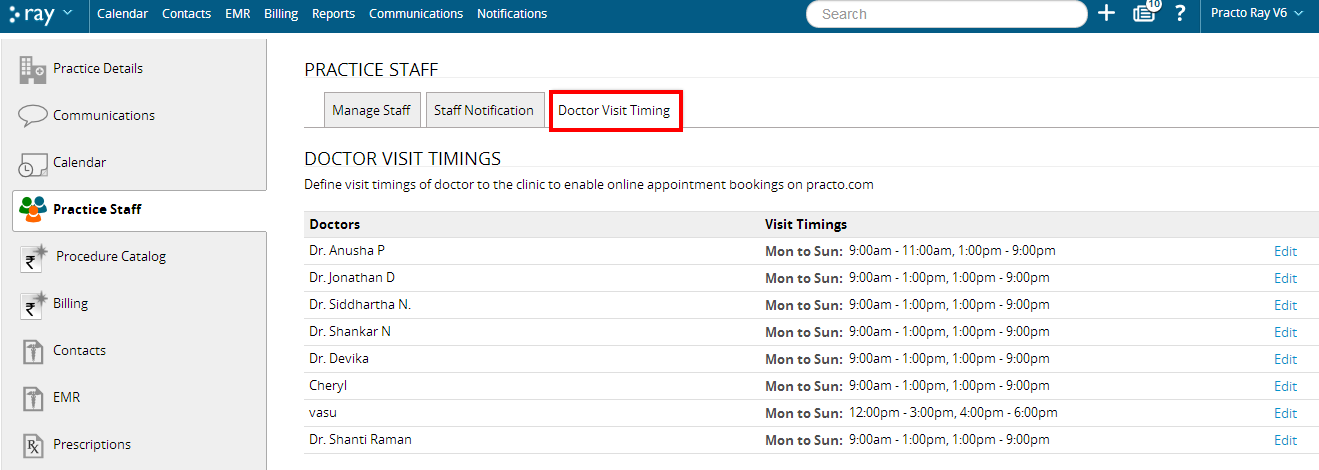
You can also edit the visit timings for any of the doctors in your clinic by clicking on the ‘Doctor Visit Timing’ tab located on this page.
Data Security:
Ensuring that your data is safe is our top most priority. All the data that you provide to Practo is confidential and all Practo servers are hosted within HIPAA compliant Virtual Private Cloud inside Amazon Cloud. No one, except the Practo security team, has access to our systems.
However, even you can do your bit to ensure that your data is safe by making sure that your password has at least 8 characters.
In case you decide to use a common word, try using a unique combination of letters, numbers and special characters that can increase the complexity of your password.