Practo Ray simplifies your practice. There are many settings that can help you maximise the use of your Practo Ray account.
The most basic aspect of settings deal with the specifics of your Ray account.
Opening the Settings Page.
Click on the Settings icon on the top-right corner. You will see a drop down menu, click on ‘Settings’ here.
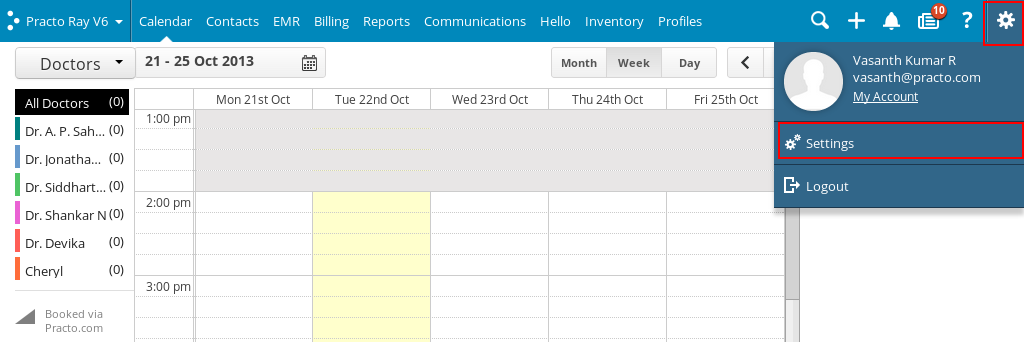
You will now be redirected to a new page with all details regarding your practice. By default you will be on the Practice details page.
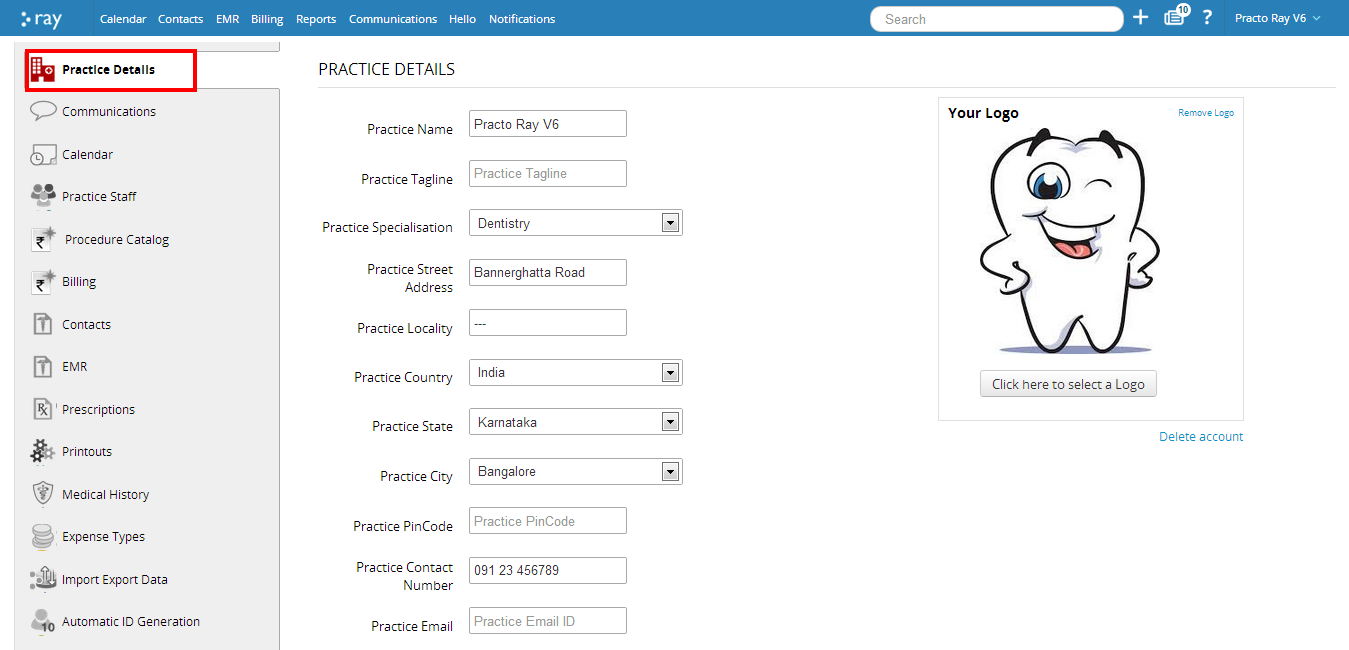
Updating your Practice details
You can change/update your practice details at any point of time.
Practice Name and Tagline
If you want to update your tagline, click on ‘Practice Tagline’ and enter the tagline for your practice.
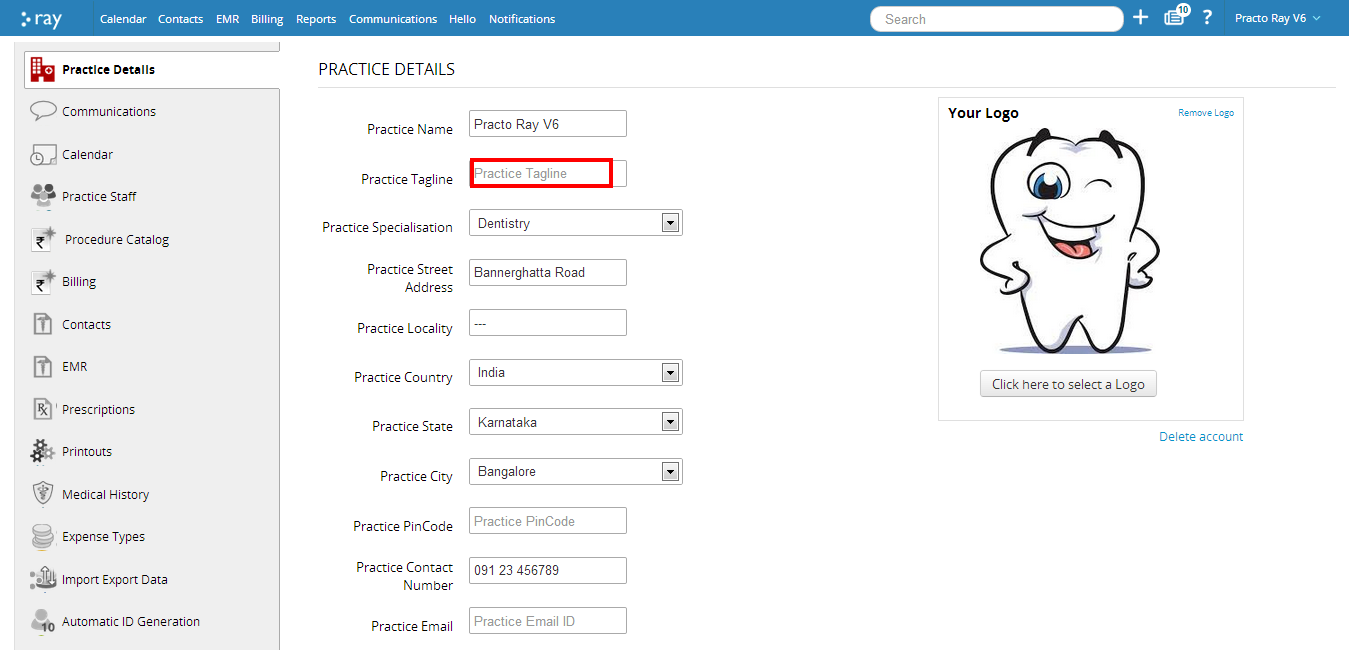
Updating your Practice Specialization
To update the specialization of your clinic, Click on ‘Practice Specialization’ on the Settings page. You will find a drop down with names of specializations. Select the specialization for your practice and click on Save.
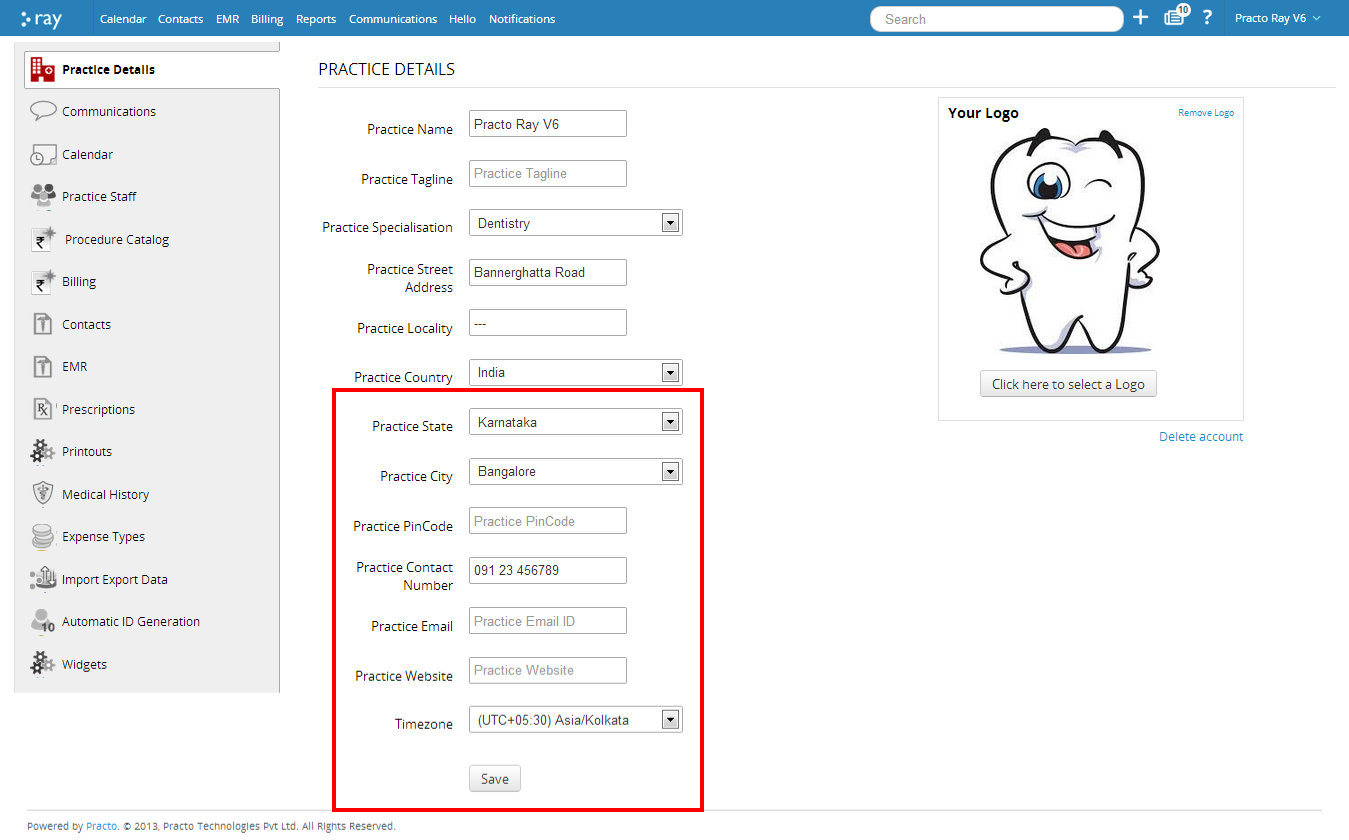
You can also update the logo for your clinic. You will see the option to select a logo located to the right side of this page. Click on it. Now select the picture from your computer and upload it.
![]()
You can update other details such as your address, your timezone, contact number, email id and your website on this page as well.
Customize your Communications
You can customize the communications that are sent via your Practo Ray account.
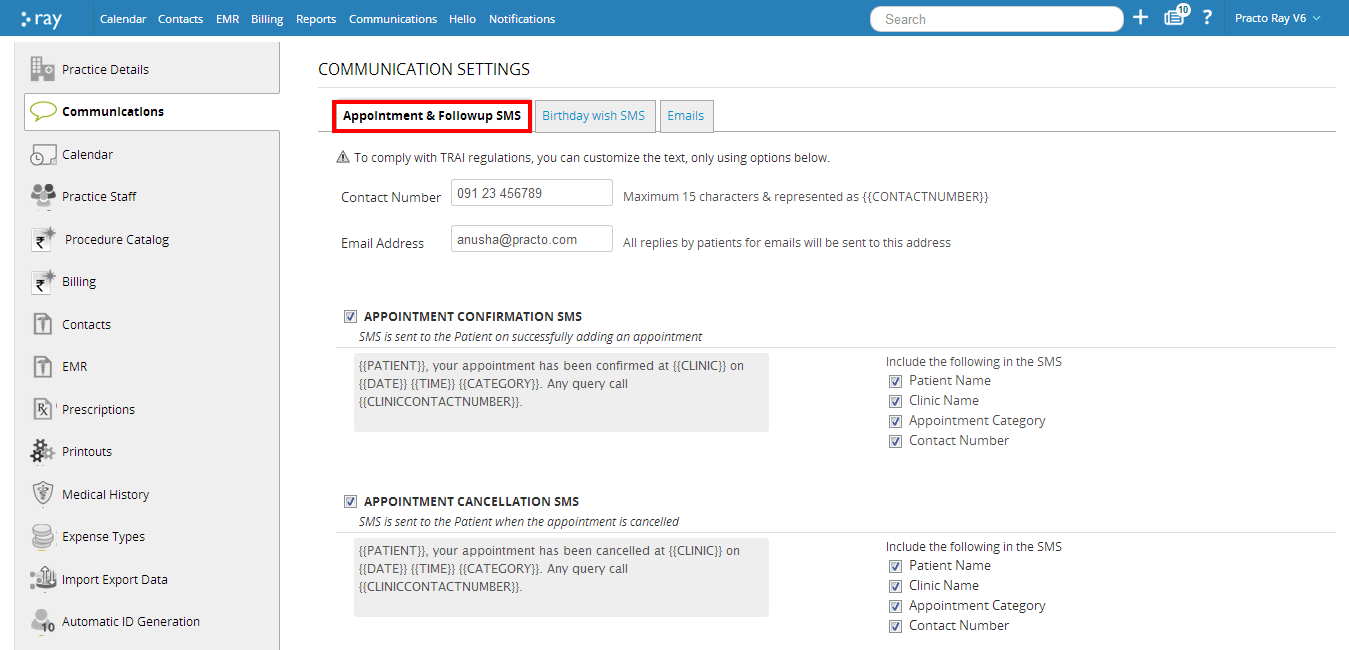
Appointments and follow up SMS:
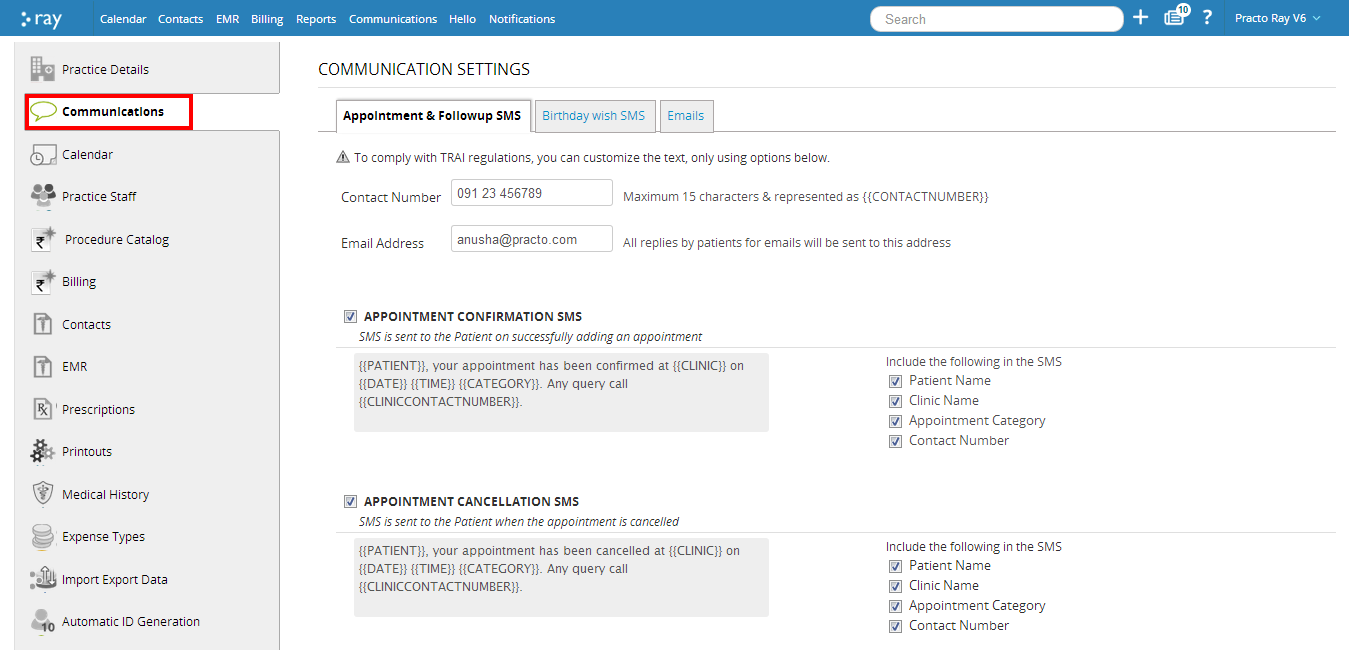
To make changes in your communications, click on ‘Communications’ which is located on the left side of the Settings screen.

Now click on ‘Appointments and follow up SMS’. You can choose to send out Appointment Confirmation SMS, Appointment Cancellation SMS, Appointment Reminder SMS and Follow up SMS through this page.
You can further customize the content of your SMS by checking the boxes located next to each message text.
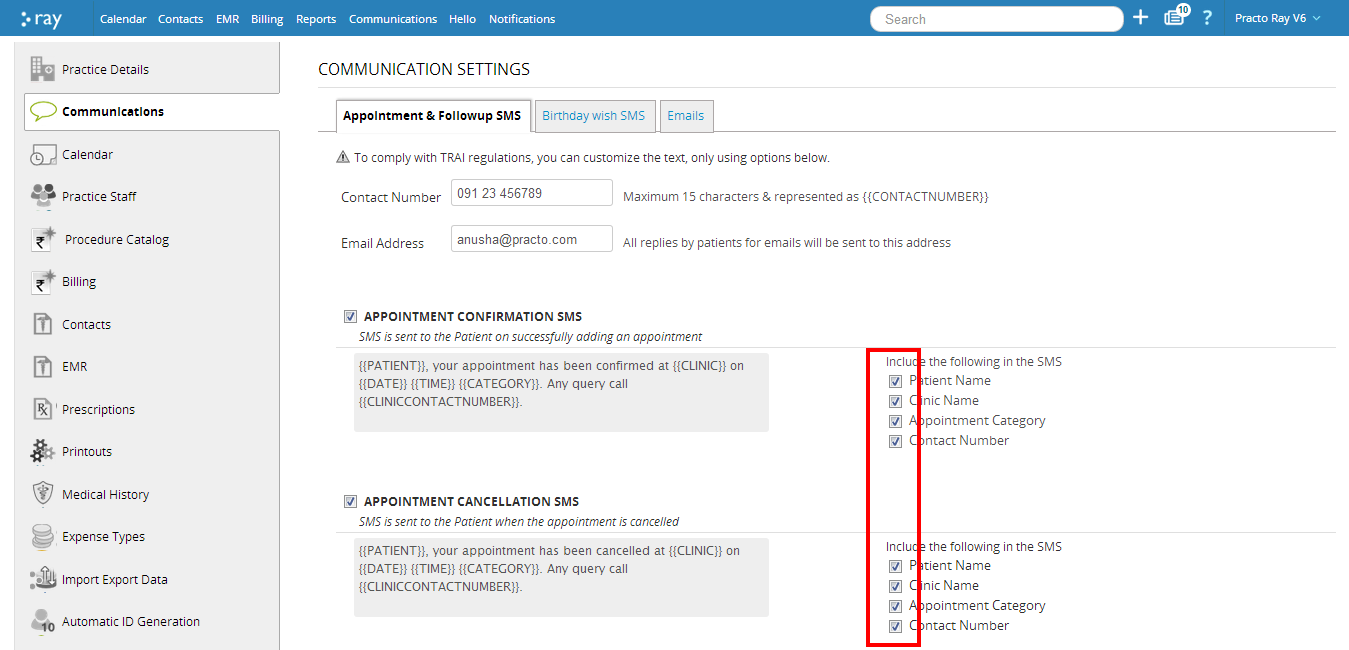
You can even specify the time when your reminders are sent out by choosing the appropriate time slot next to ‘Appointment Reminder SMS’. Once you have made all the changes you require, click on ‘Save changes’.

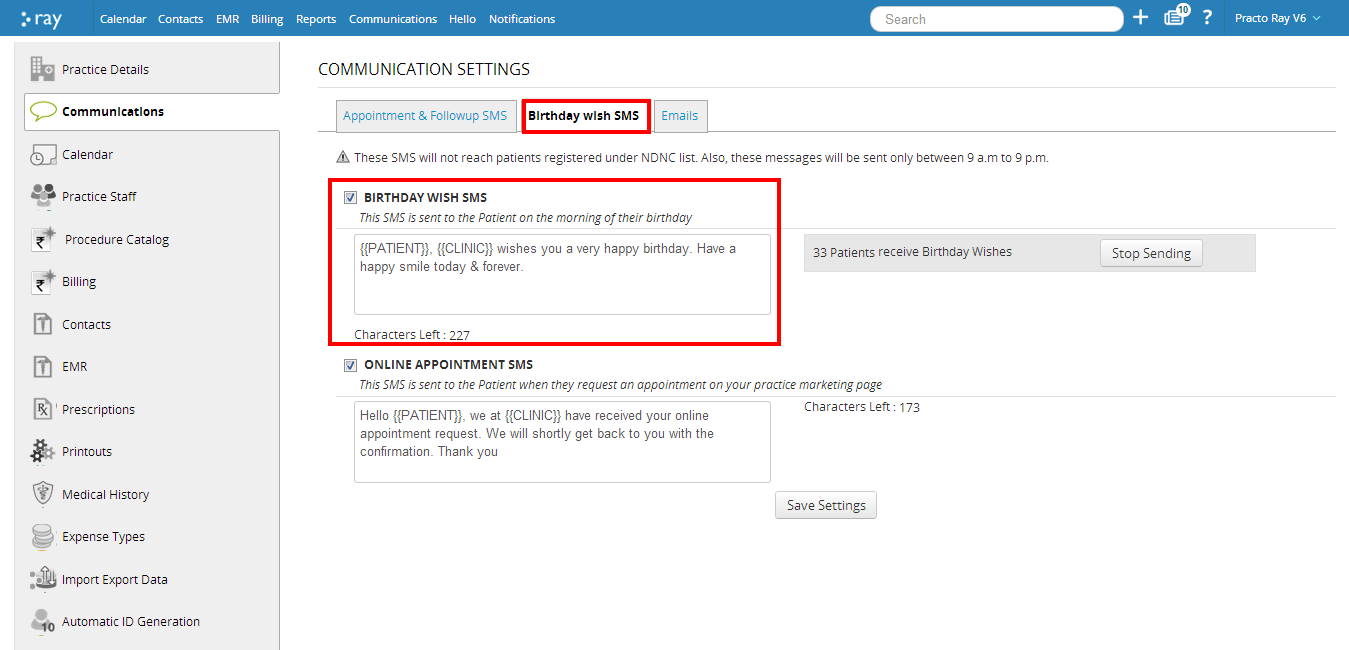
Birthday wish SMS
You can even personalize the SMS sent to your patients on their birthdays.
To customize the birthday SMS, log into your Practo Ray account, click on ‘Communications’ tab on the left side of the Settings screen.
Now click on ‘Birthday wish SMS’. To send automatic birthday wishes to your patients, check the box that appears next to ‘Birthday Wish SMS’.
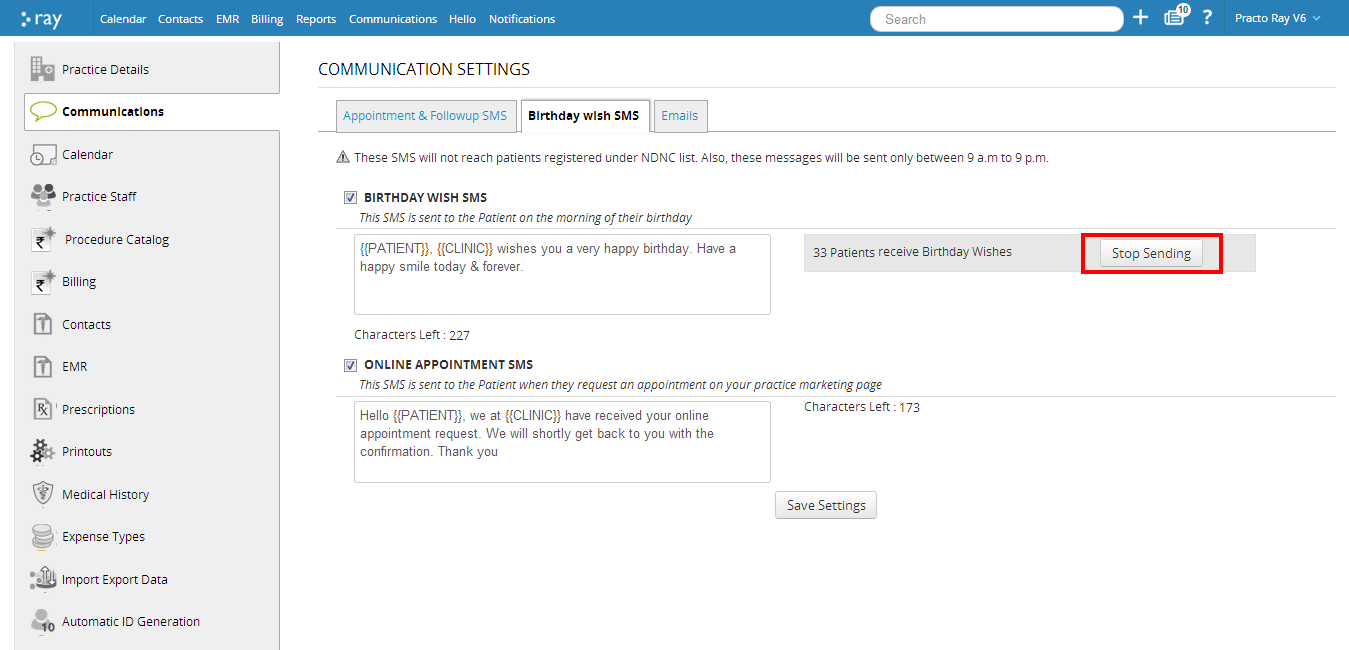
If you no longer wish to send out birthday wishes, click on the ‘Stop’ button next to the message text box. Once you have made all the changes you require, click on ‘Save changes’.
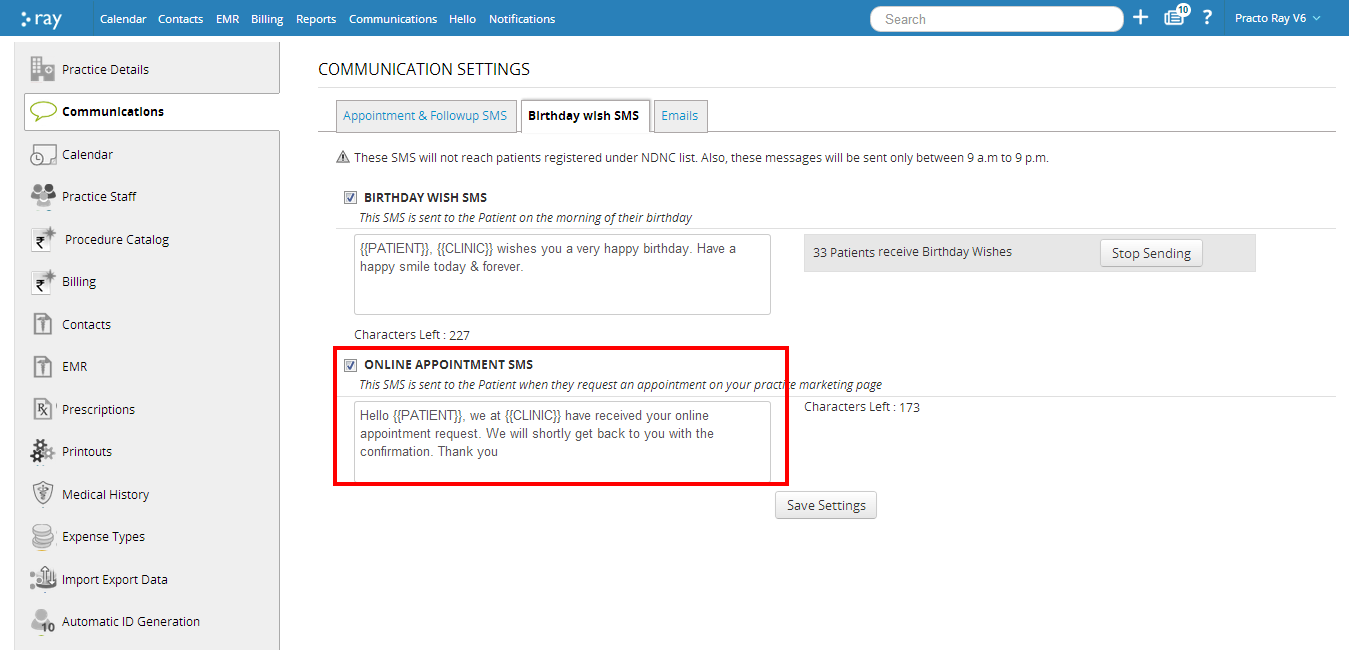
Online appointment SMS:
You can even opt to receive SMS’s when an online appointment is booked for your clinic by selecting the option located on this page.
Emails:
To change the content of the emails that are sent from your Practo Ray account, click on ‘Communications’ tab located on the left side of the Settings screen.

Click on ‘Emails’ that is located on top of the new page.
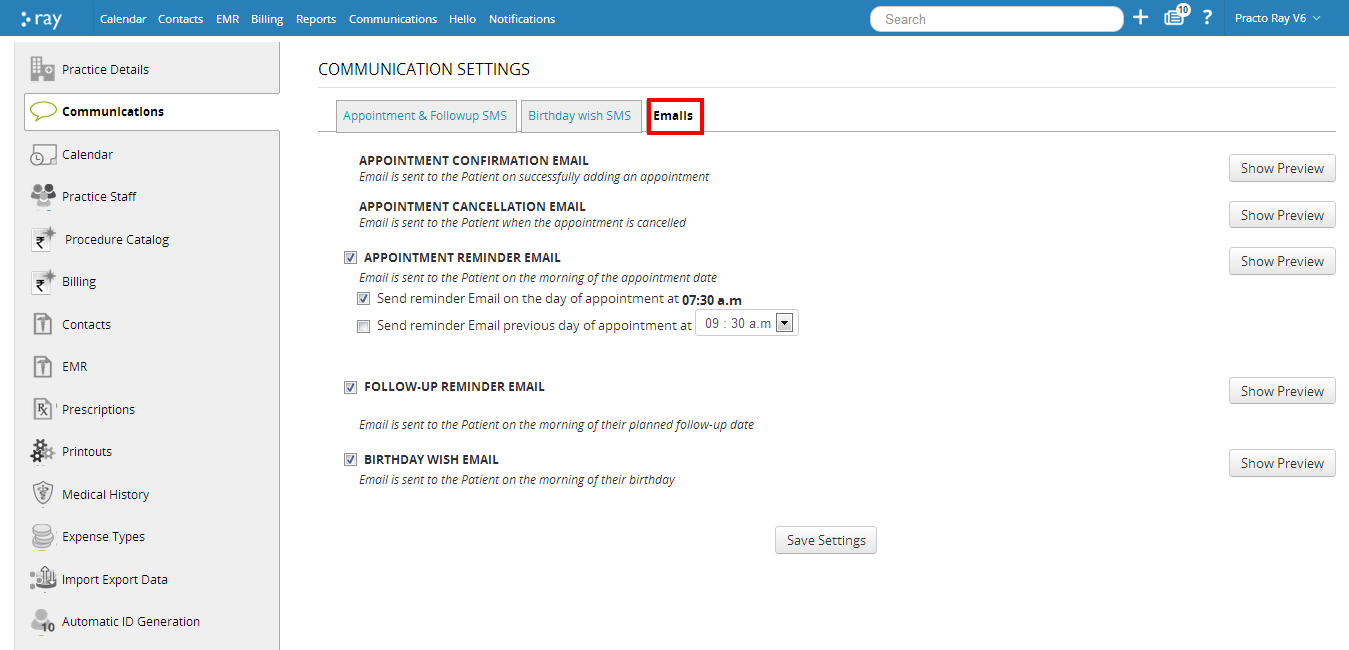
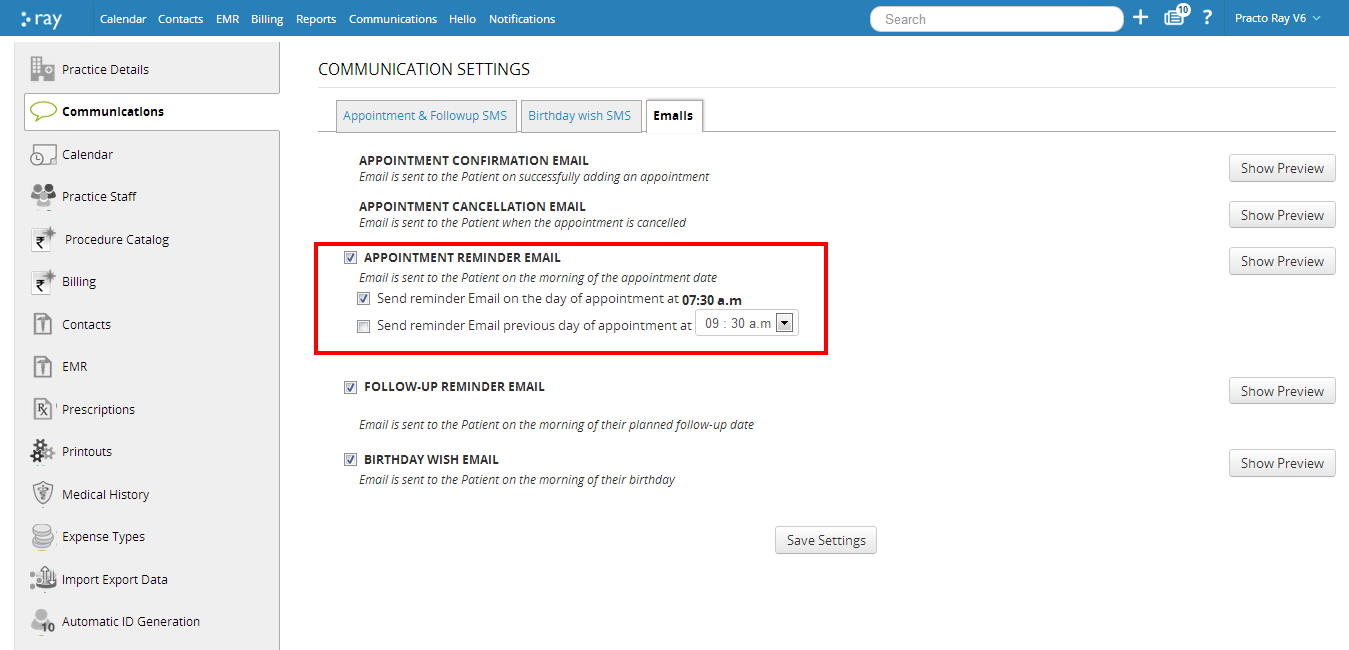
You will be directed to a new page with all the emails that are currently being sent out through your account. The appointment cancellation and appointment confirmation emails are sent out by default.
You can choose whether or not to send out Appointment Reminder emails, follow up reminder mails and birthday mails through this page.

Further you can customize the time when you would want to send out the Appointment Reminder Email by selecting the appropriate time on this page. You can even opt to send another email on the day prior to the appointment by checking the box next to it. You can even specify the time when the appointment reminder on the previous day goes out.
Managing your Staff details:
You can even manage your staff details using your Practo Ray account.
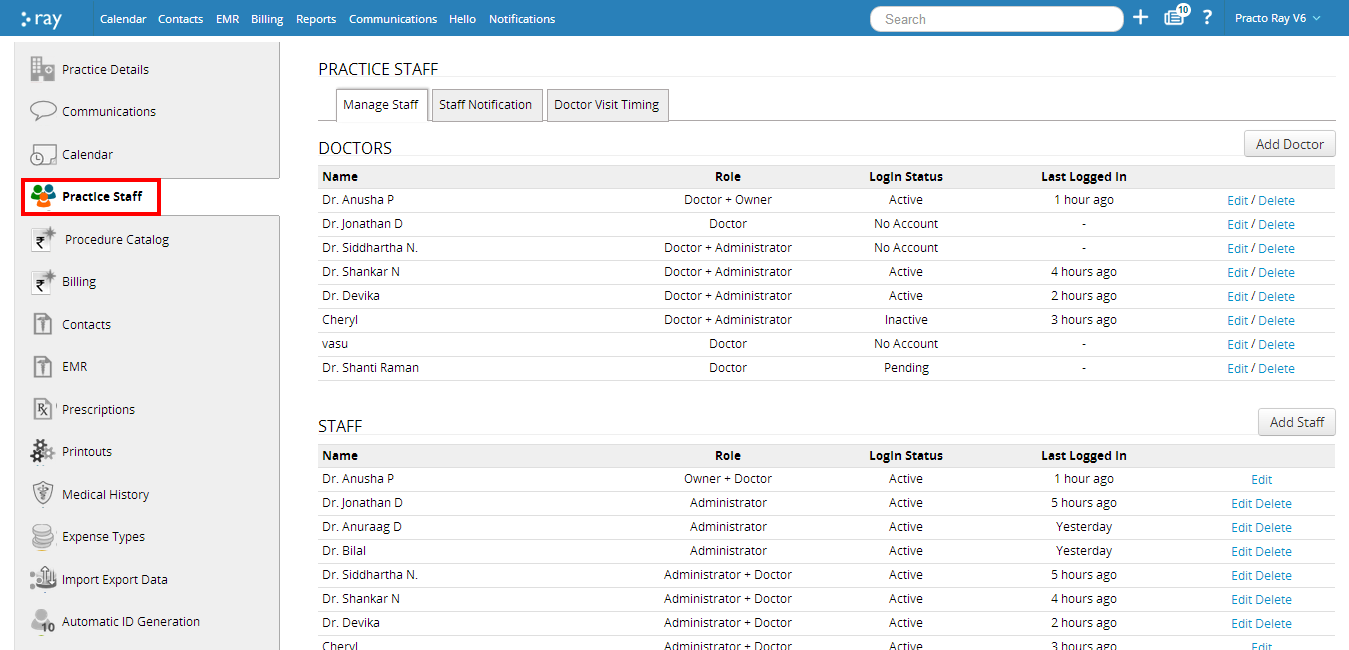
To view all details with regards to the doctors/staff that are currently employed at your clinic, Click on ‘Practice Staff’ from the list on the left side of the Settings screen.

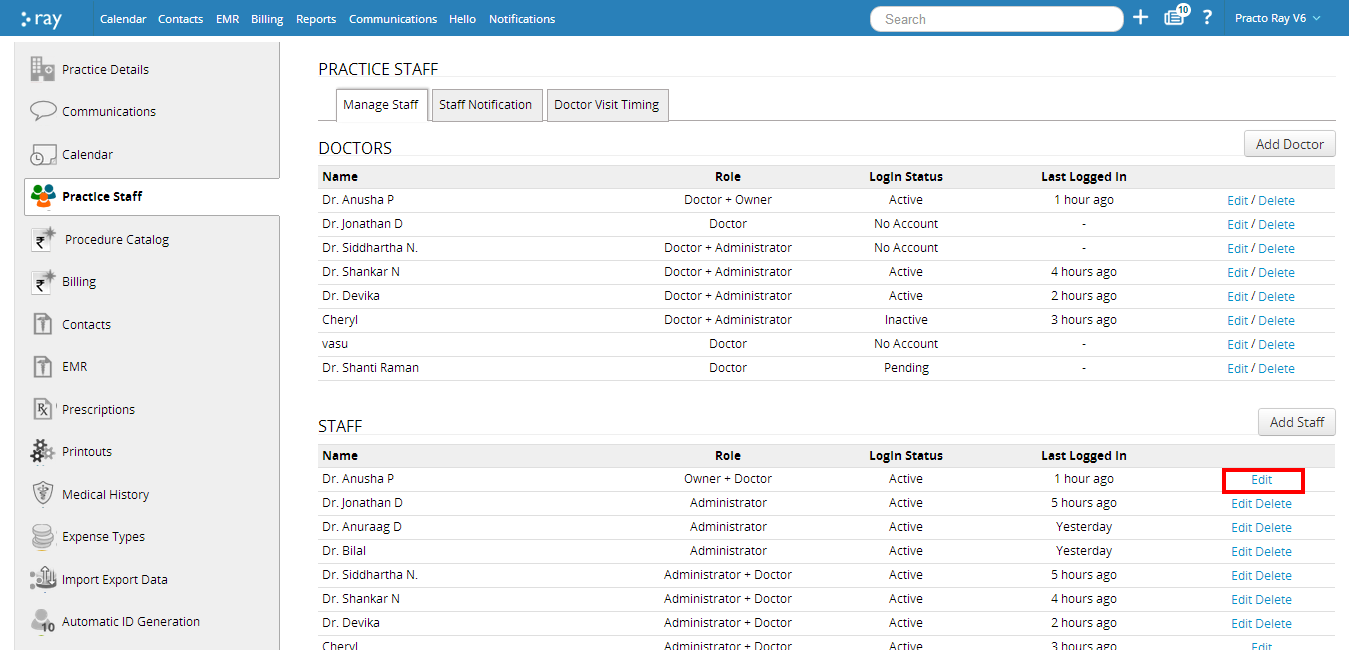
Managing your Staff:
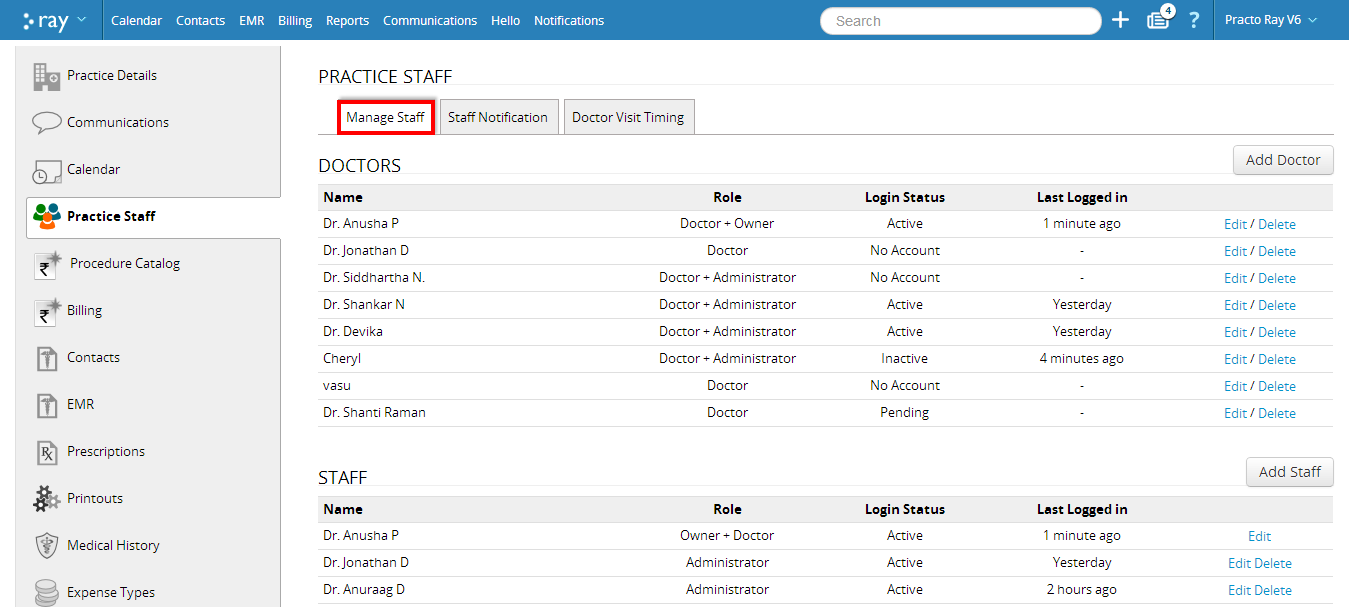
Click on ‘Manage Staff’ located on top of the new screen that pops up. You will now be able to see all details about the staff that are currently employed at your clinic.
Doctor access:
To specify the controls for each specific doctor, click on ‘Edit’ located next to the doctor’s name.
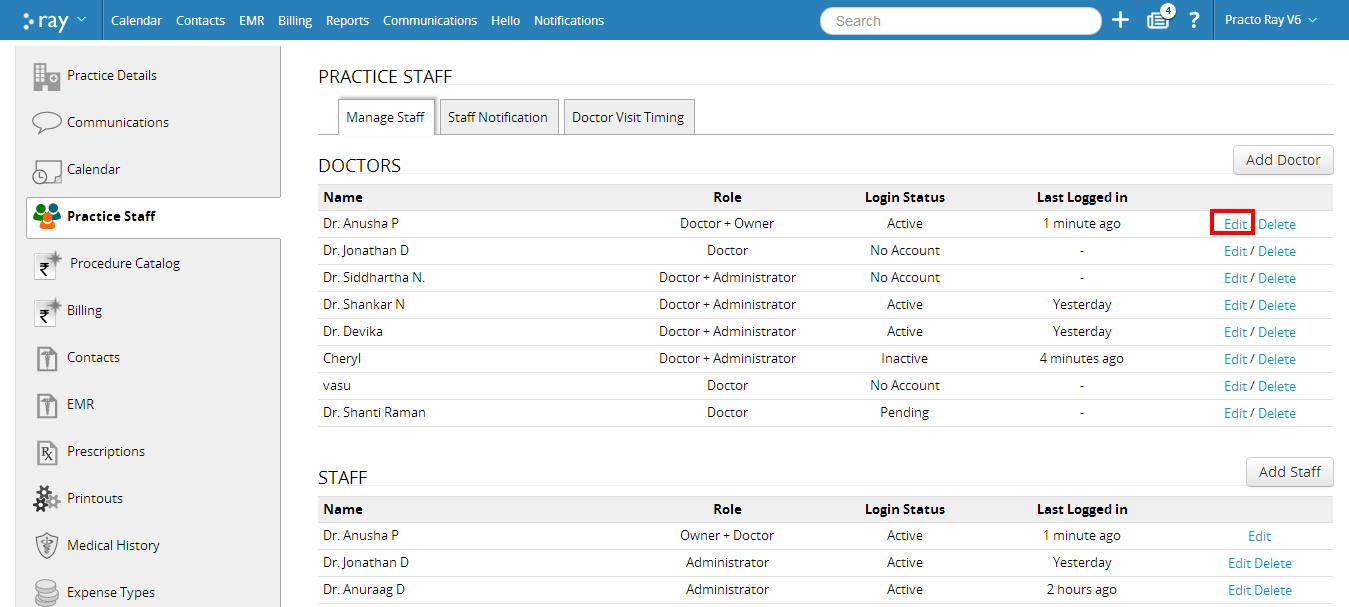
This will prompt you to a new page. Here, you can specify further details such as calendar colour to be used as well as activate his/her Doctor access.

Adding a new doctor:
Click on ‘Add Doctor’.
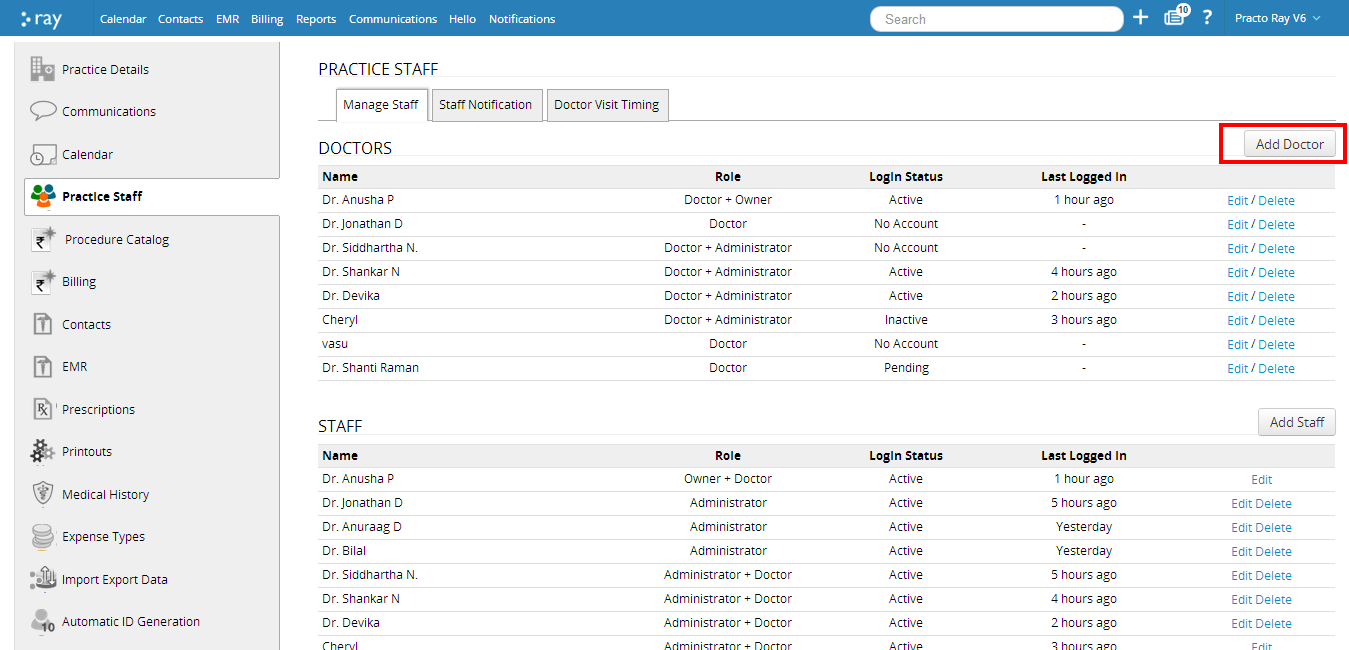
This will prompt you to a new page where you can specify the details of the new doctor. You can even assign a colour to your doctor that will help you differentiate between appointments for different doctors. You can even decide whether or not to give the doctor Admin rights by selecting the appropriate option at this stage.

Deleting a doctor:
If a doctor no longer practices at your clinic and you wish to delete his/ her details from your Practo Ray account, click on the delete button located next to the doctor’s name.

Staff access:
To specify the controls for each specific staff, click on ‘Edit’ located next to the staff member’s name. This will prompt you to a new page.
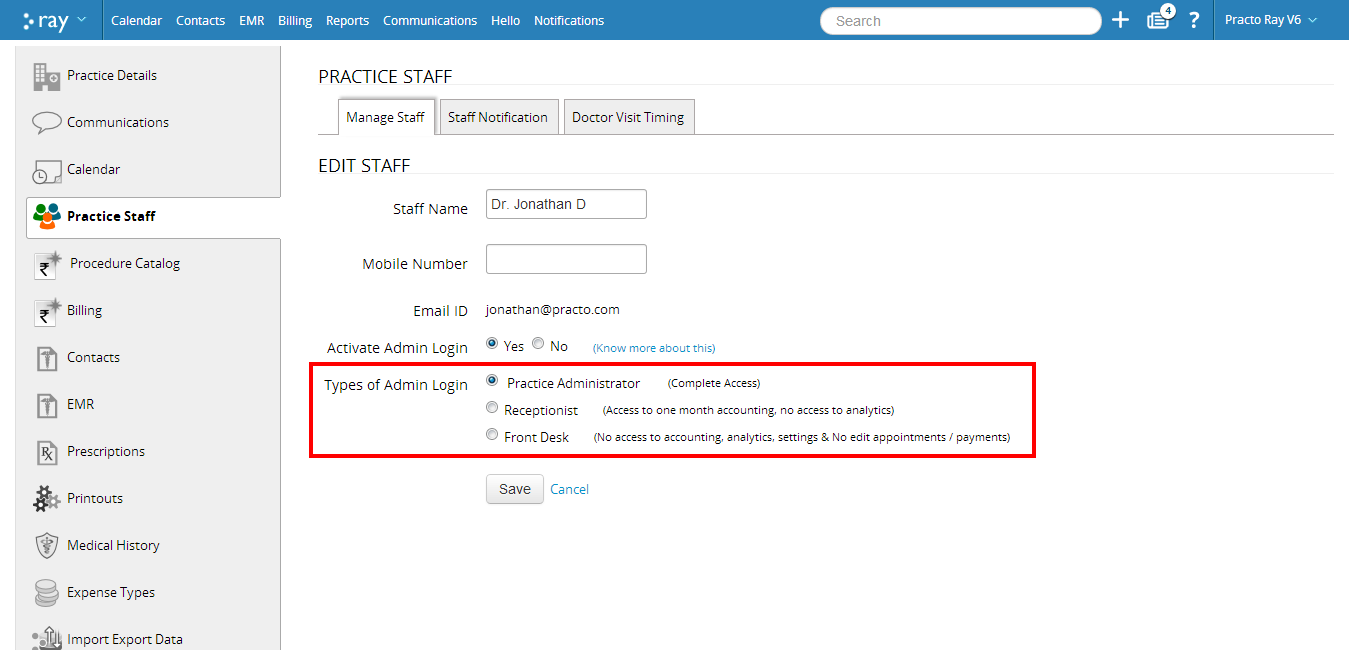
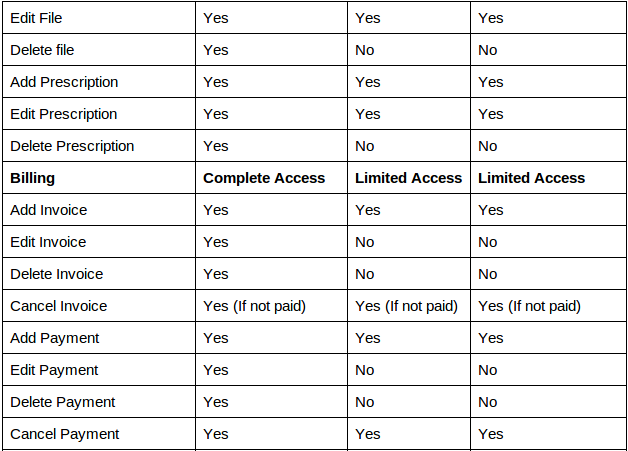
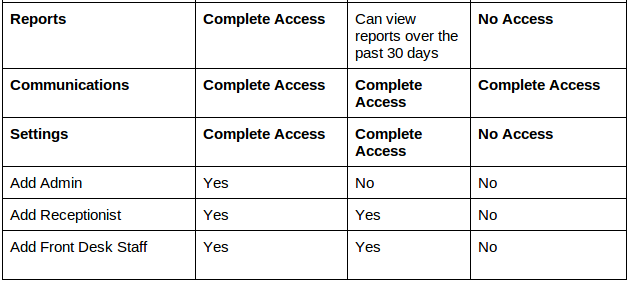
You can activate Admin login for the staff member of your choice. Once you activate Admin login for a staff member, you will be further prompted to specify the nature of access you would want him/ her to have. There are three kinds of access you can grant.
Each access controls different aspects of your business.
Practice Administrator: Has complete access over the all aspects of the account.
Receptionist: Has access to accounting for one month but no access to the analytics
Front desk: Has access to all sections except accounting, analytics, settings and edit appointments/payments
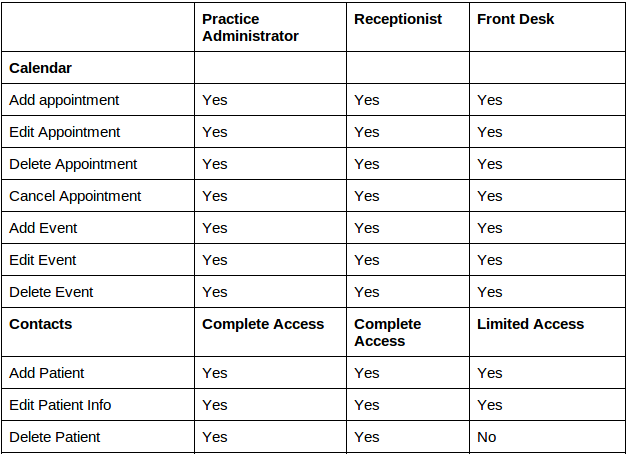
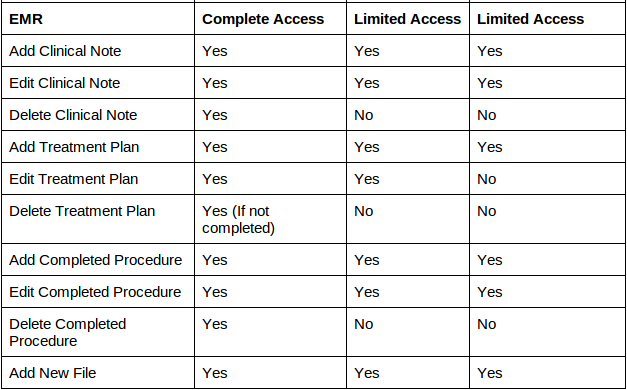
The levels of access as per the different roles are as follows:
Activating notifications for staff:
You can choose what kind of notifications need to be sent to doctors/staff that are working at your clinic. Click on ‘Practice Staff’ located on the list on the Settings page. You will be able to view all details about the doctors and staff employed at your clinic currently.
SMS notification:
To enable SMS notification for a doctor/staff, click on ‘Staff Notification’ located on top of this screen. This will show you a list of all the doctors and staff that are currently part of your Practo Ray account for your practice. There are several check boxes next to every name. To activate SMS notification for a doctor/staff, check the appropriate box next to their name.
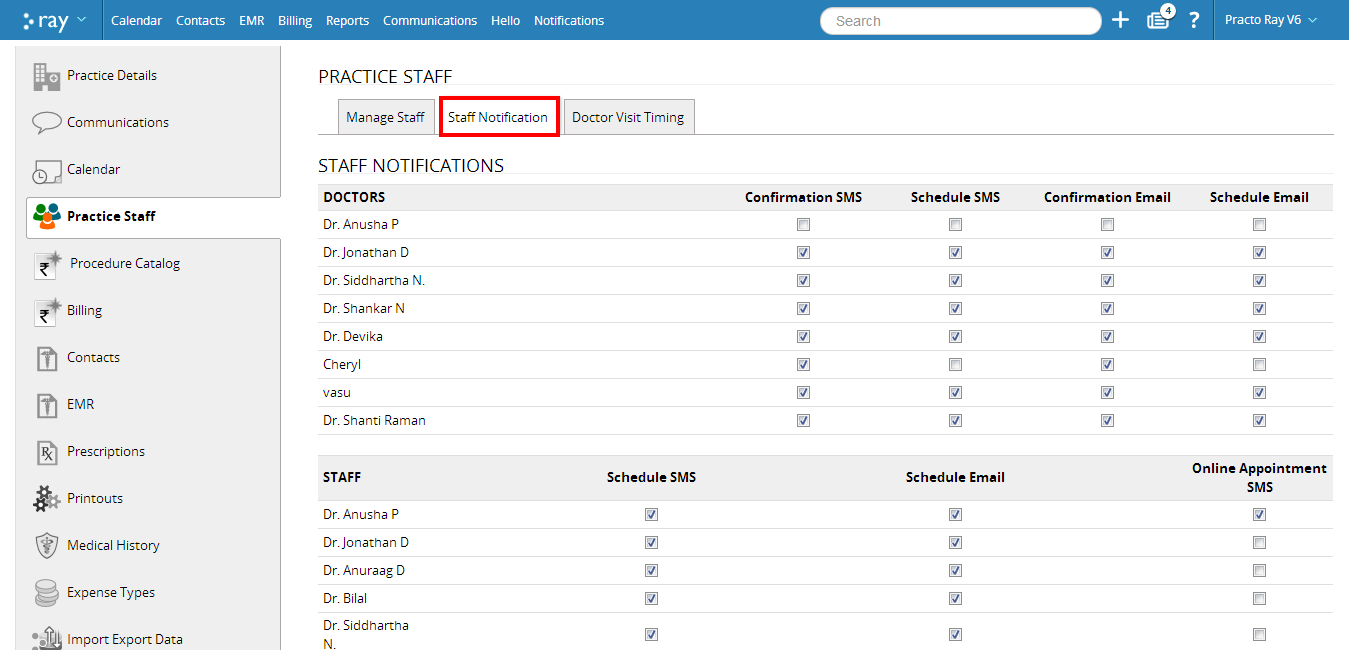
Confirmation SMS: This allows doctors/staff to receive an automatic SMS every time there is a confirmed appointment.
Schedule SMS: The schedule SMS feature allows doctors/staff to receive notifications for the confirmed schedule at the start of every day.
Email notification:
You can even send emails to the doctors/staff at your clinic so that they can know their schedule before hand. To enable email notifications, check the appropriate box next to the doctor/staff’s name.

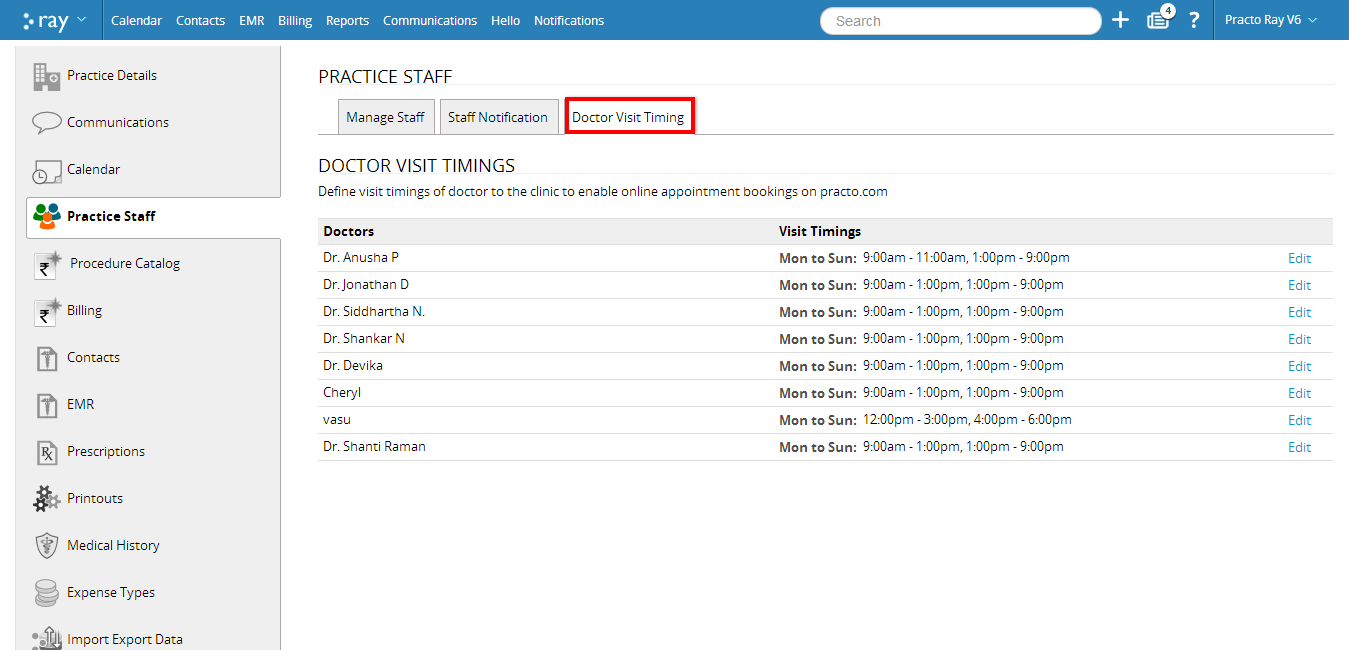
Doctor Visit Timings:
To specify the visit timings of each doctor, click on ‘Practice Staff’ from the list on the left side of the Settings page.

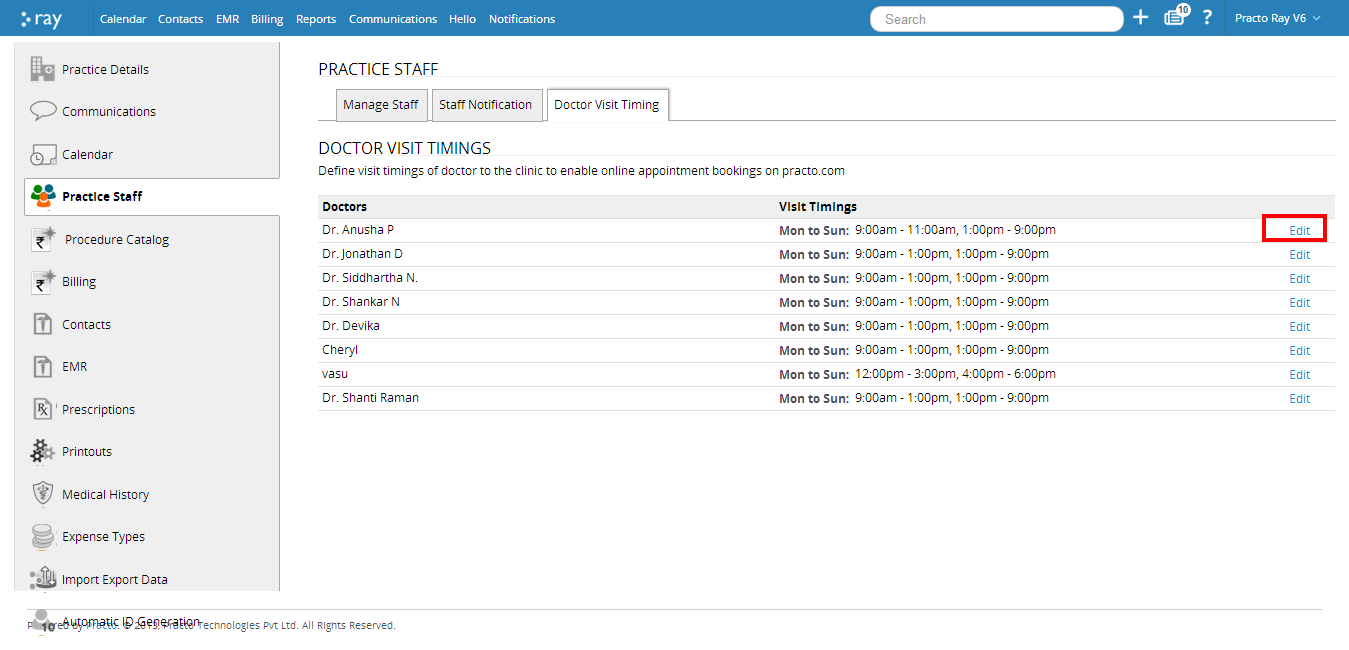
Click on ‘Doctor Visit Timing’ on the new page. You will be directed to a page with the names of all the doctors that are currently practising at your clinic as well as their timings.
To update the timings for any doctor, click in ‘edit’ next to that doctor’s name.
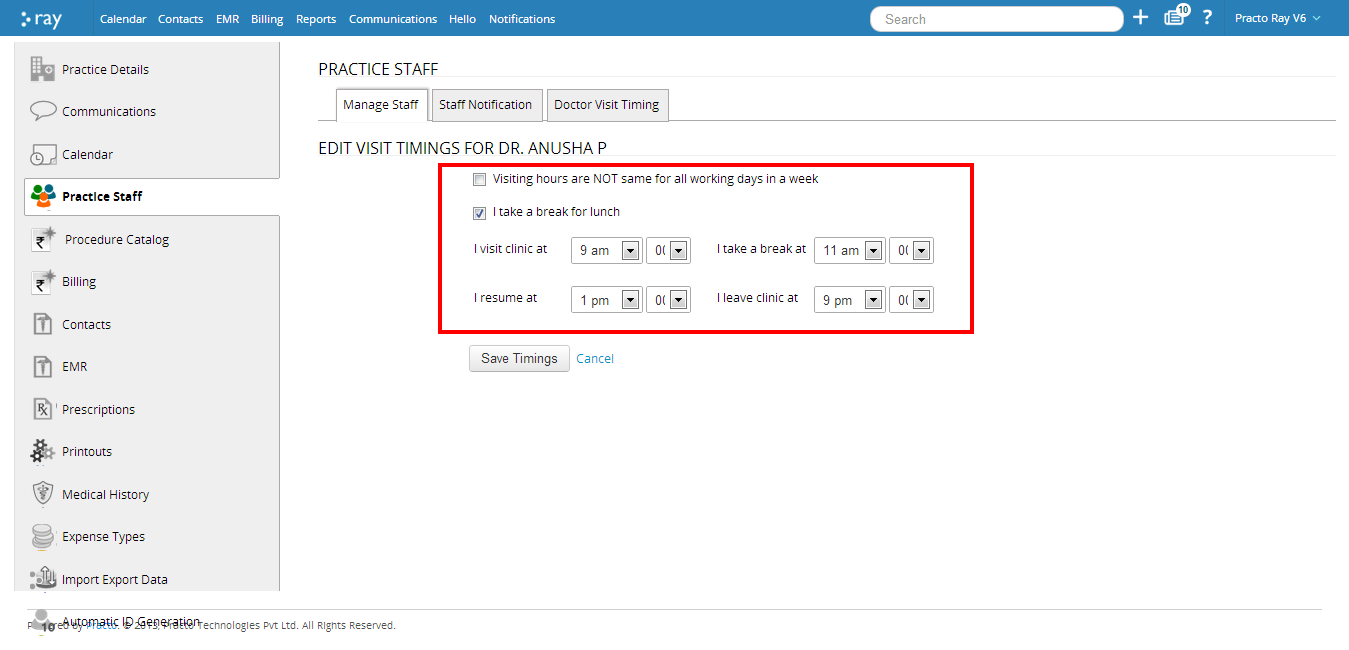
You will be directed to a page where you can edit the timings for that doctor. Once you have made the required changes, click on ‘Save timings’.
Medical History:
You can even update/ change the options that appear while updating the medical history for your patients.
Adding Medical History:
To add a condition to the Medical History, click on ‘Medical History’ located in the list of the left side of the Settings screen.
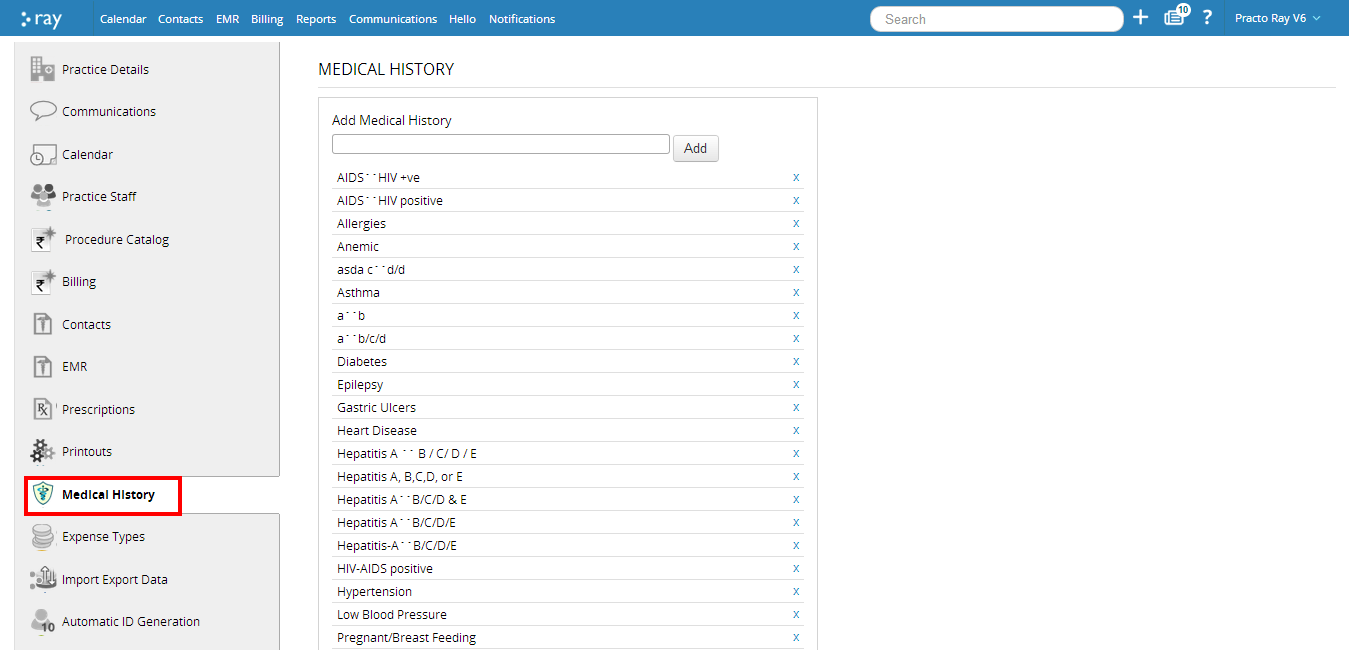
You will now be able to see all the conditions that are currently already updated in your account. To add a new condition, enter it in the space provided and click on ‘Add’.

Deleting Medical History:
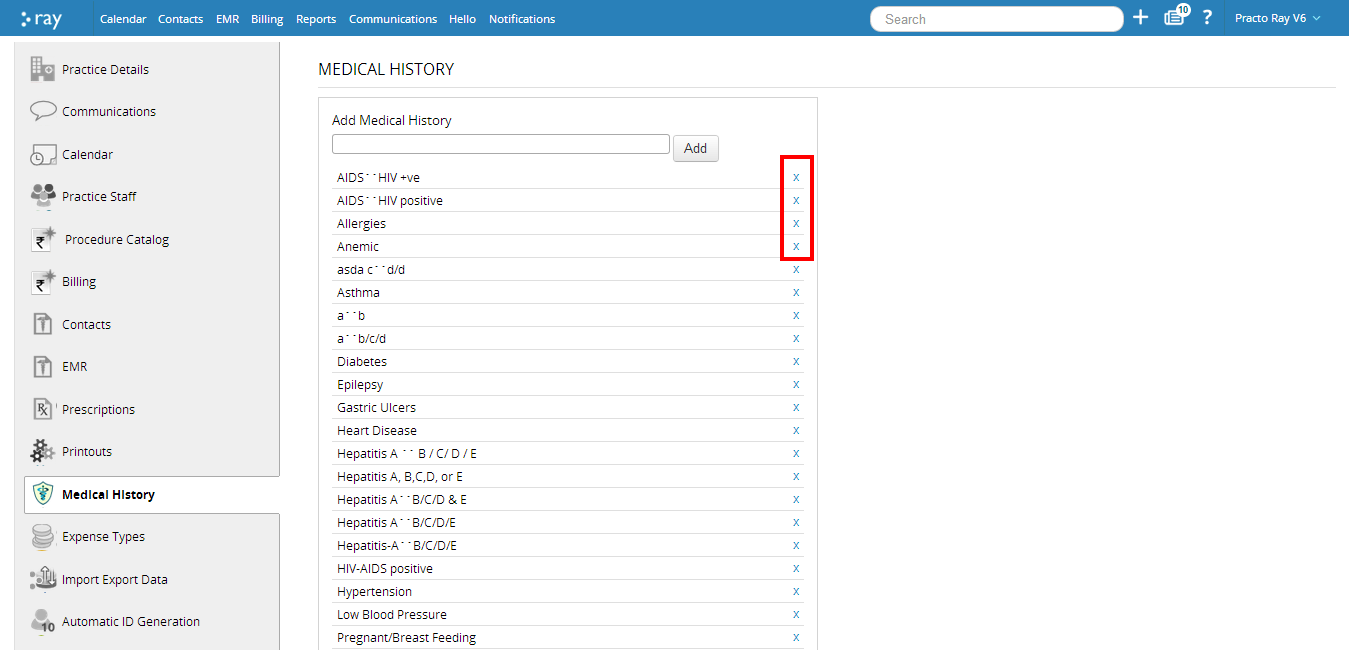
To delete a condition from the existing Medical History, click on ‘Medical History’ located in the list of the left side of the Settings screen.

You will now be able to see all the conditions that are currently already updated in your account. To delete a condition, click on the cross mark next to that particular condition. It will automatically be removed from the ‘Medical History’ list.
Expenses:
You can organize all your expenses by adding them to your Practo Ray account. This will help you monitor your bills and understand your expense areas better.
Adding expense types:
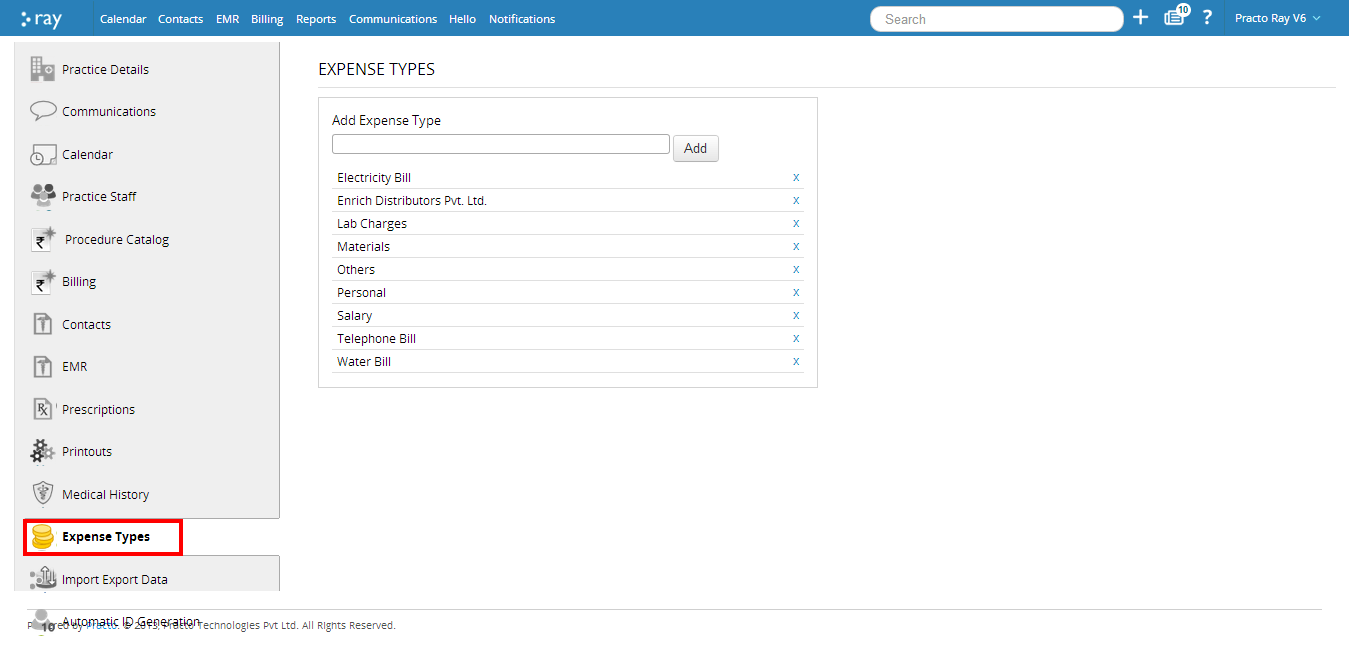
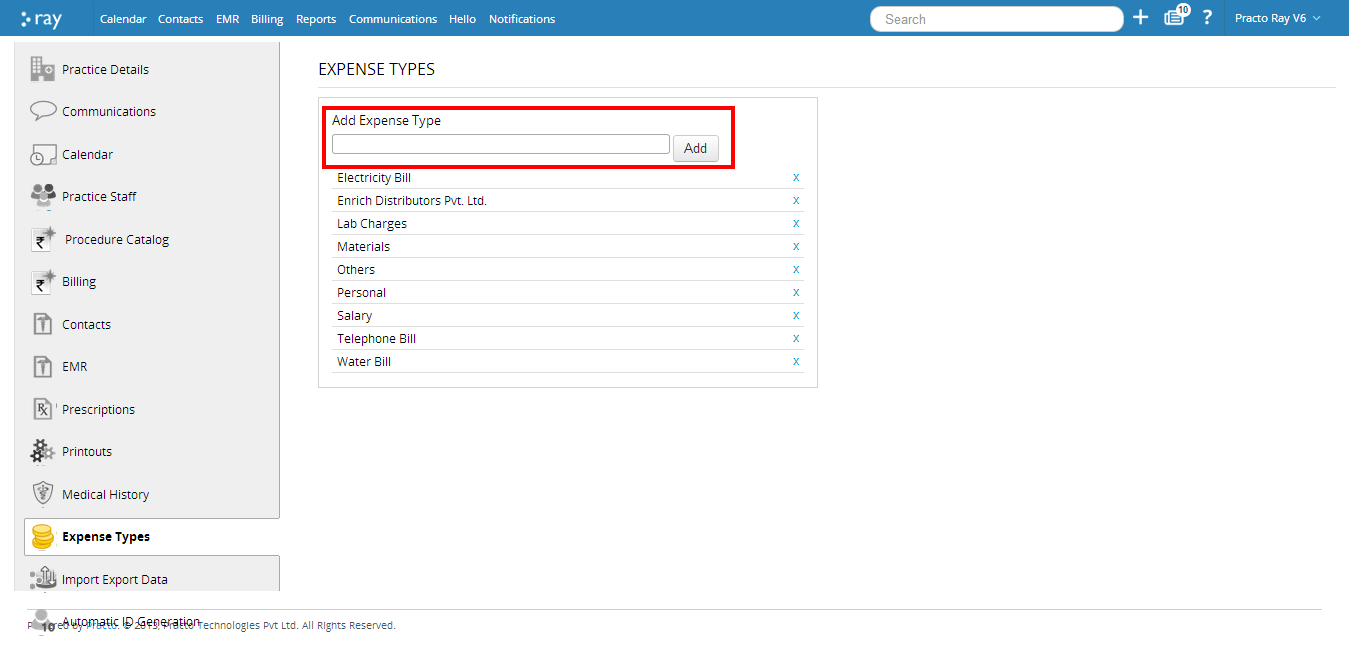
To add a new expense type, click on ‘Expense Types’ located in the list of the left side of your screen. You will now be able to see all the expenses that are currently already updated in your account.
To include a new expense type, enter it in the space provided and click on ‘Add’.
Deleting expense types:
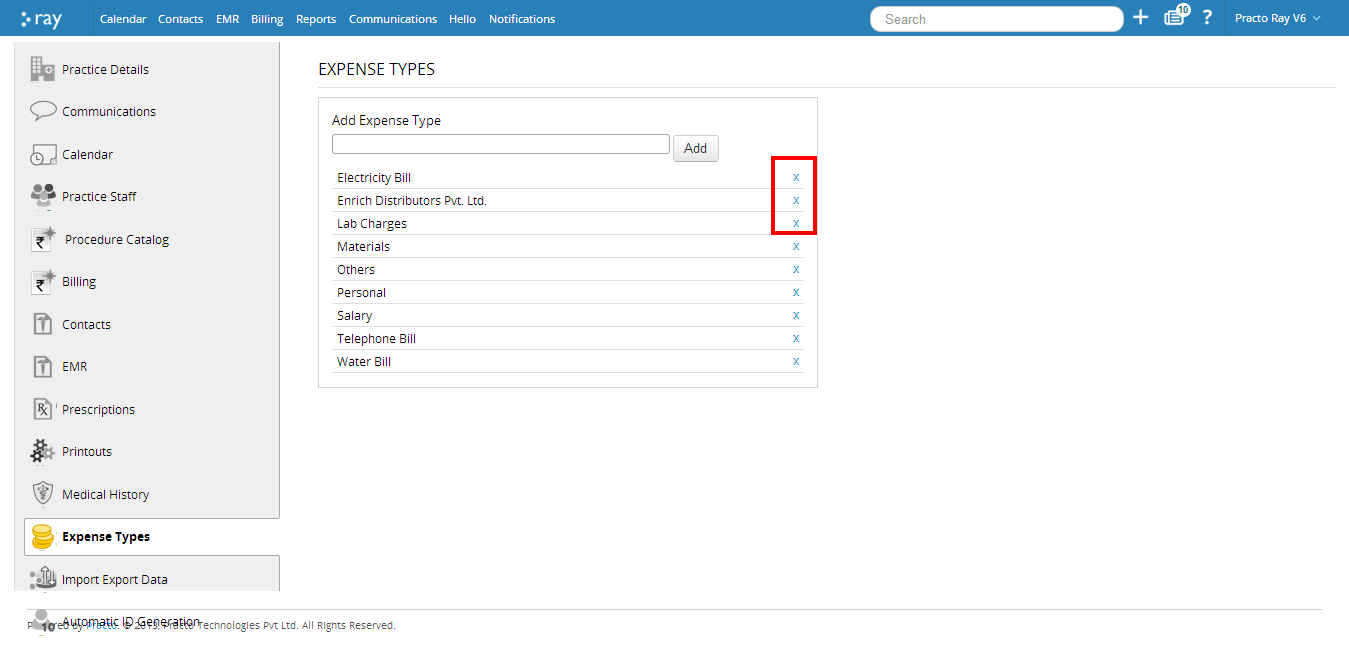
To delete an expense type, click on ‘Expense Types’ located in the list of the left side of your screen. You will now be able to see all the expenses that are currently already updated in your account. To remove one of the expenses, click on the cross mark next to that particular expense. It will be automatically removed from the list of expenses.
Import/Export Data:
You can even upload data that you have previously created onto your Practo Ray account.
Importing data to your Practo ray Account:
You can import your list of contacts from your own system to your Practo Ray account. To do this, click on ‘Import/Export data’ located on the list that is on the left side of your screen.
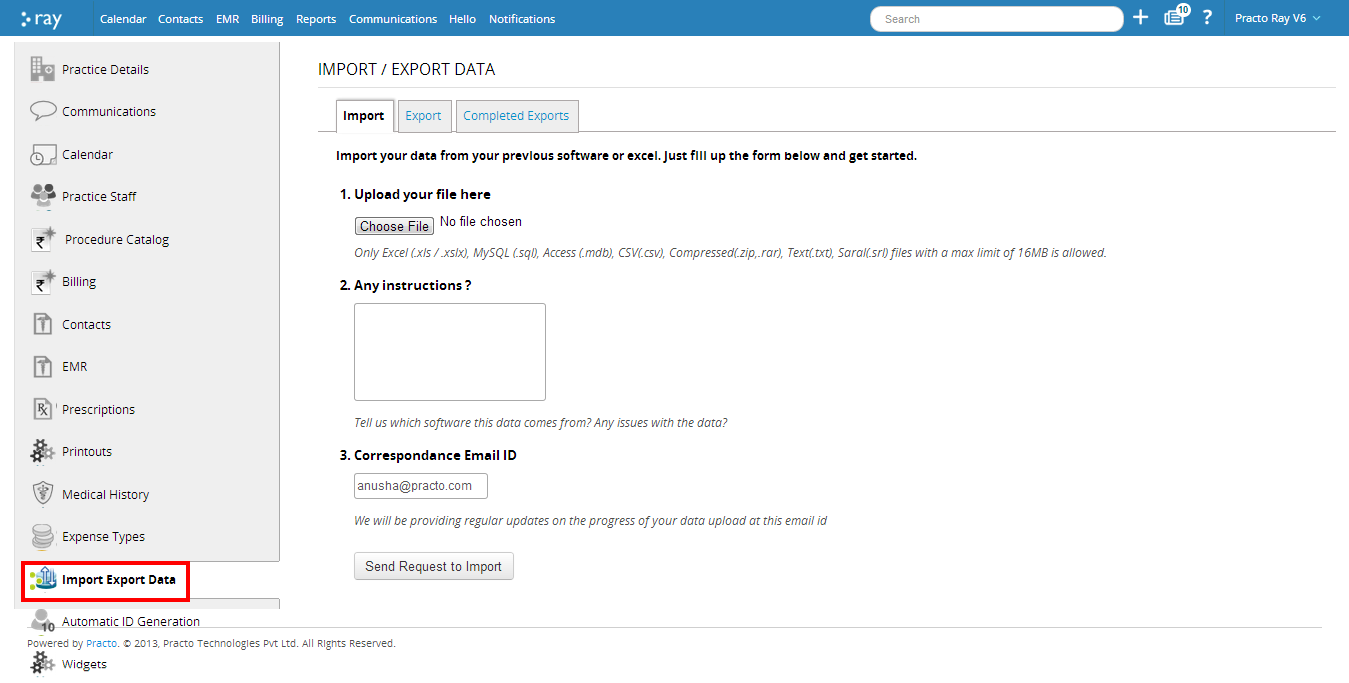
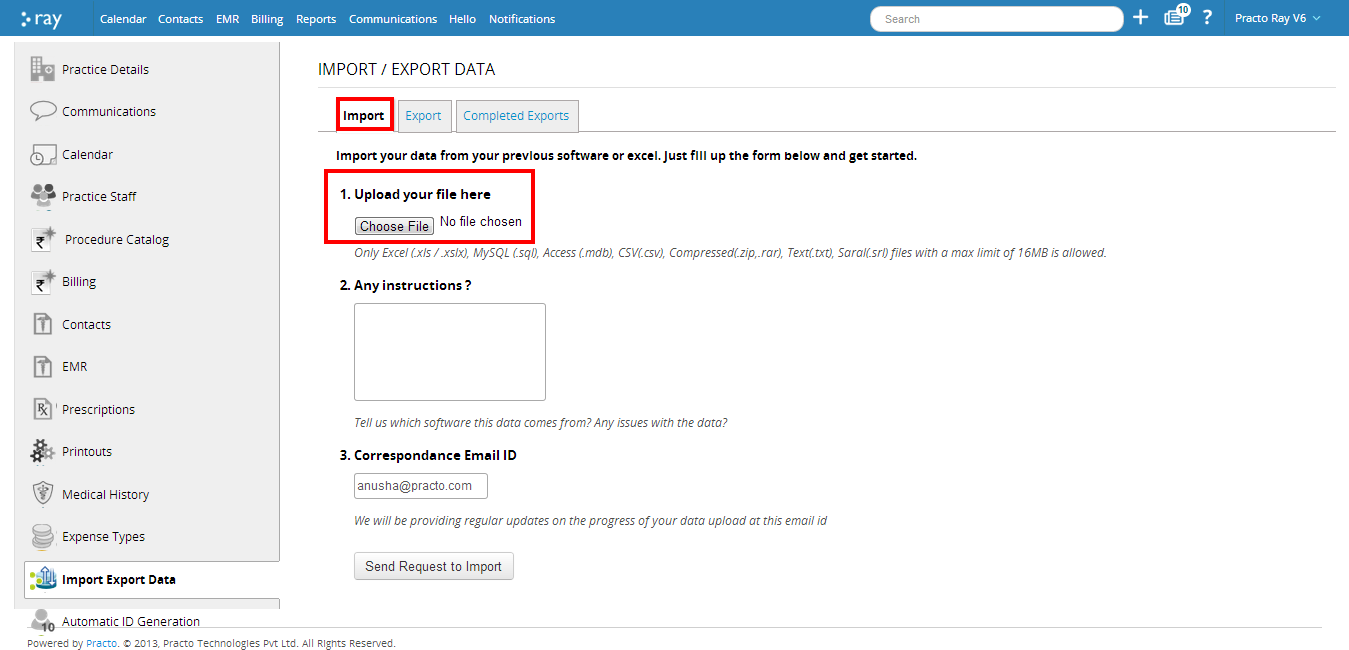
You will be redirected to a new page. By default, you will now be able to see the ‘Import’ section. To upload a file, click on the button ‘Browse’ located below the point that says ‘Upload your file here’.
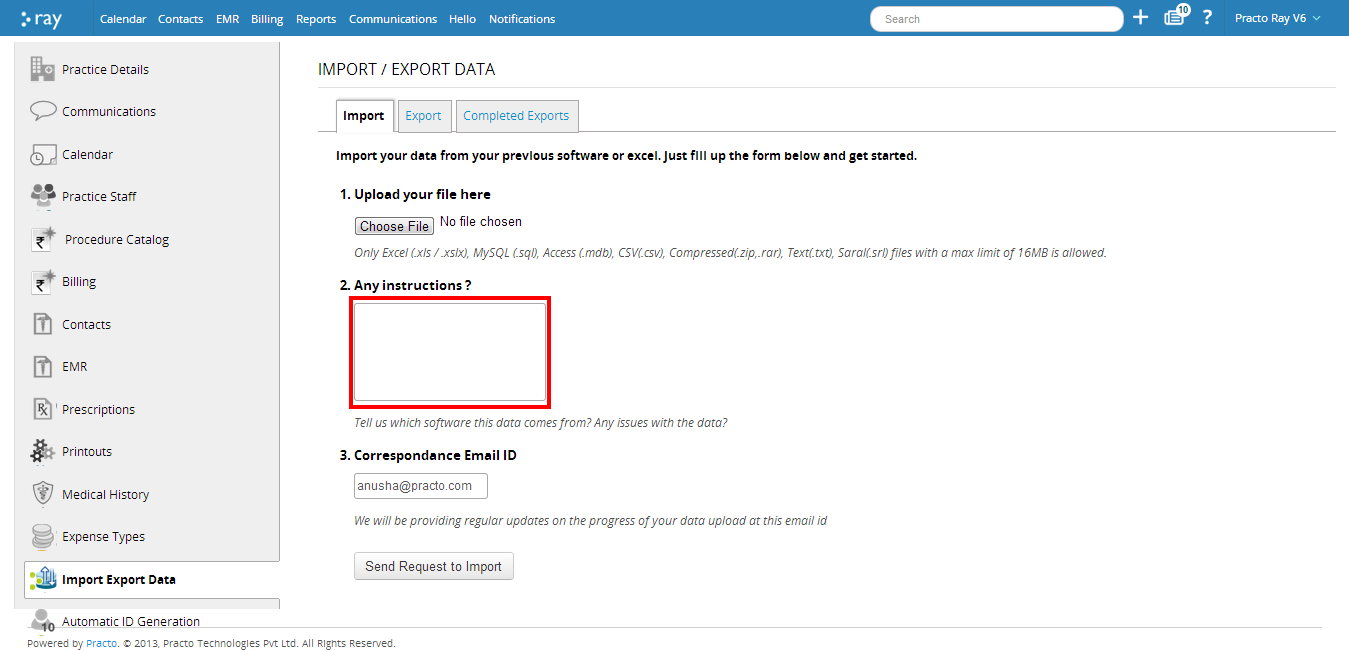
If there are any instructions you would like to give our team, you can mention it in the space provided.
Once you have included the instructions(if any) enter your correspondence email which is the email where you would want to receive any information regarding your data upload.
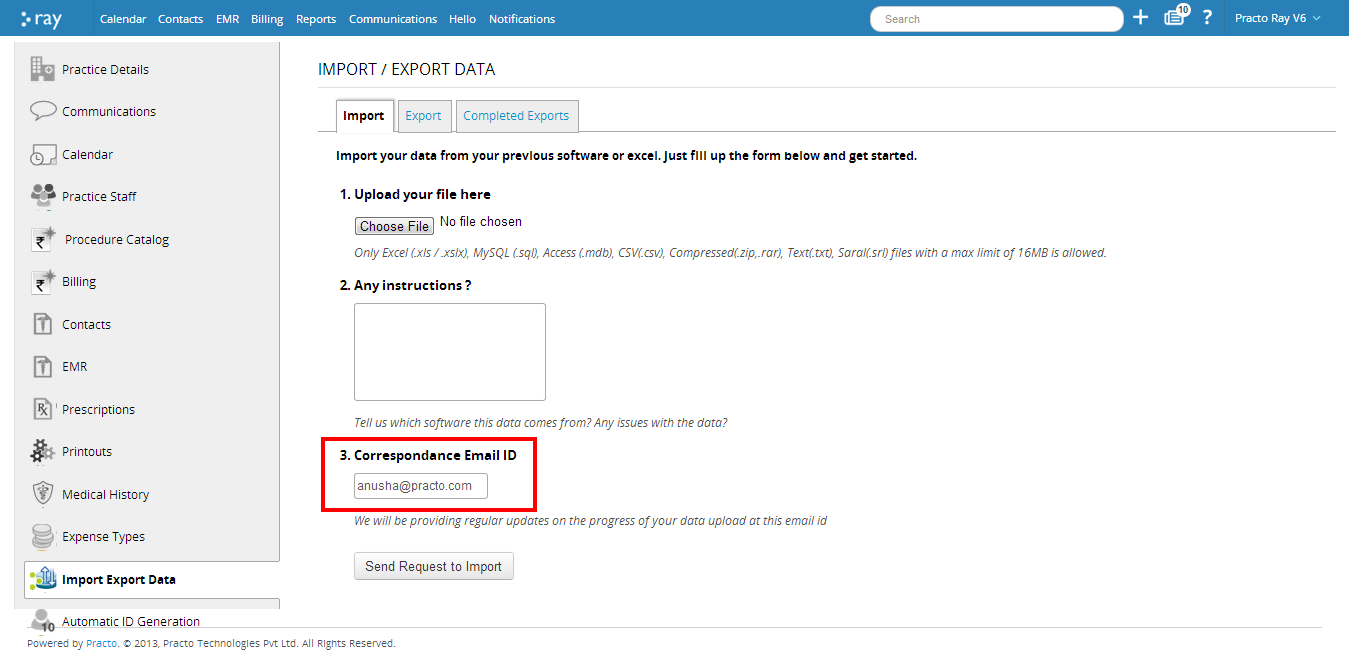
If you are fine with all the information you have entered, click on ‘Send Request to Import’.

Export:
You can even choose to export the data that you have saved on your Practo Ray account at any point of time. There are 4 kinds of data you can export: Contact, Treatment, Expenses and Appointments.

To export any of this data, put a click the box next to it. This will select that category.
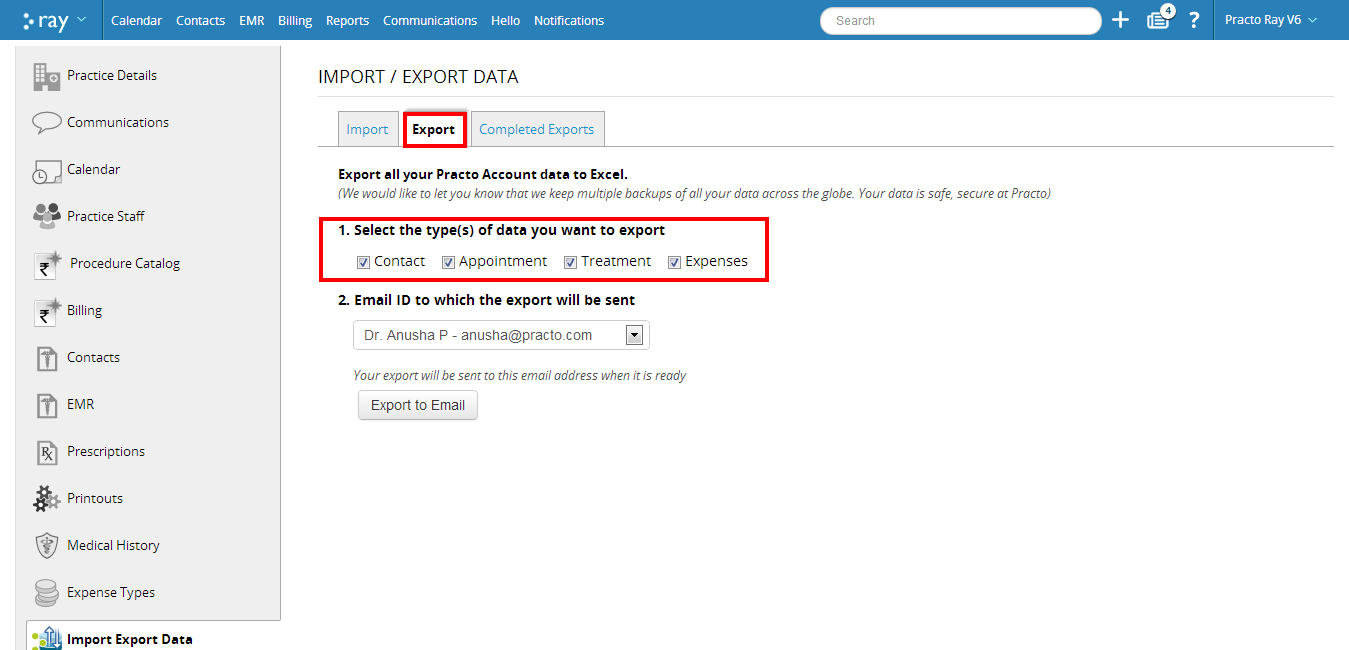
Mention the email id that you would want to receive this data on.
Once you have specified all the details on this page and confirmed them, click on ‘Export to email’.

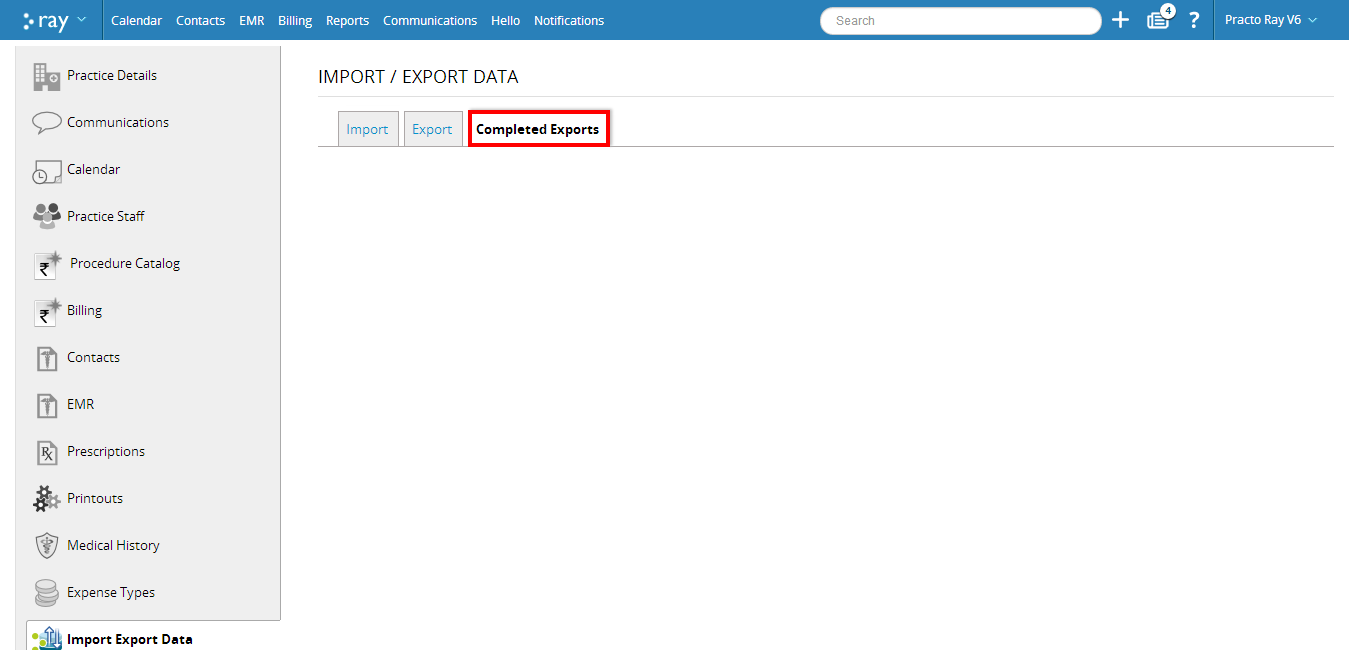
Completed Exports:
This section would include all the exports that have been successfully sent through your Practo Ray account.
Auto ID Generation:
You can automatically generate identification numbers for new patients and new bills that are added to your Practo Ray account.
This function is automatically enabled for your account once you create it. However you can change the format of the generated ID’s.
In order to do this , click on ‘Automatic ID Generation’ which is one among the options located on the left side of your screen
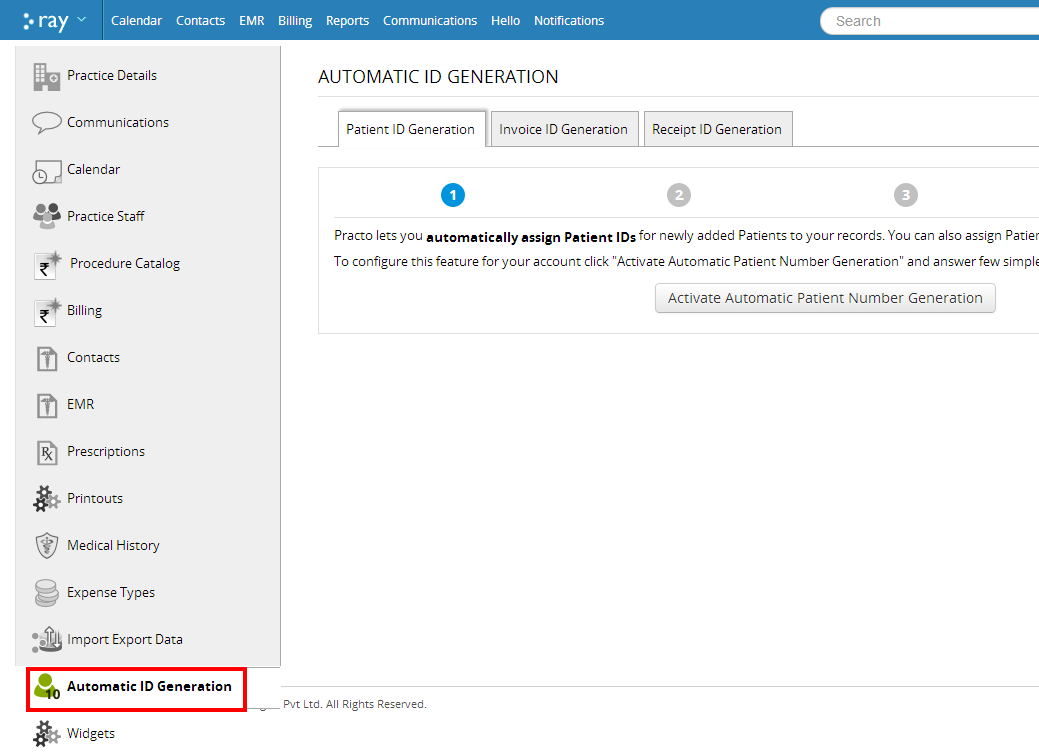
You will be directed to a new page that gives you the option to generate 3 kinds of ID’s- Patient ID’s, Invoice ID’s and Receipt ID’s
Activating Patient ID:
To activate automatic Patient ID generation, click on the tab ‘Patient ID Generation’ and select the ‘Activate Automatic Patient Number Generation’ button.

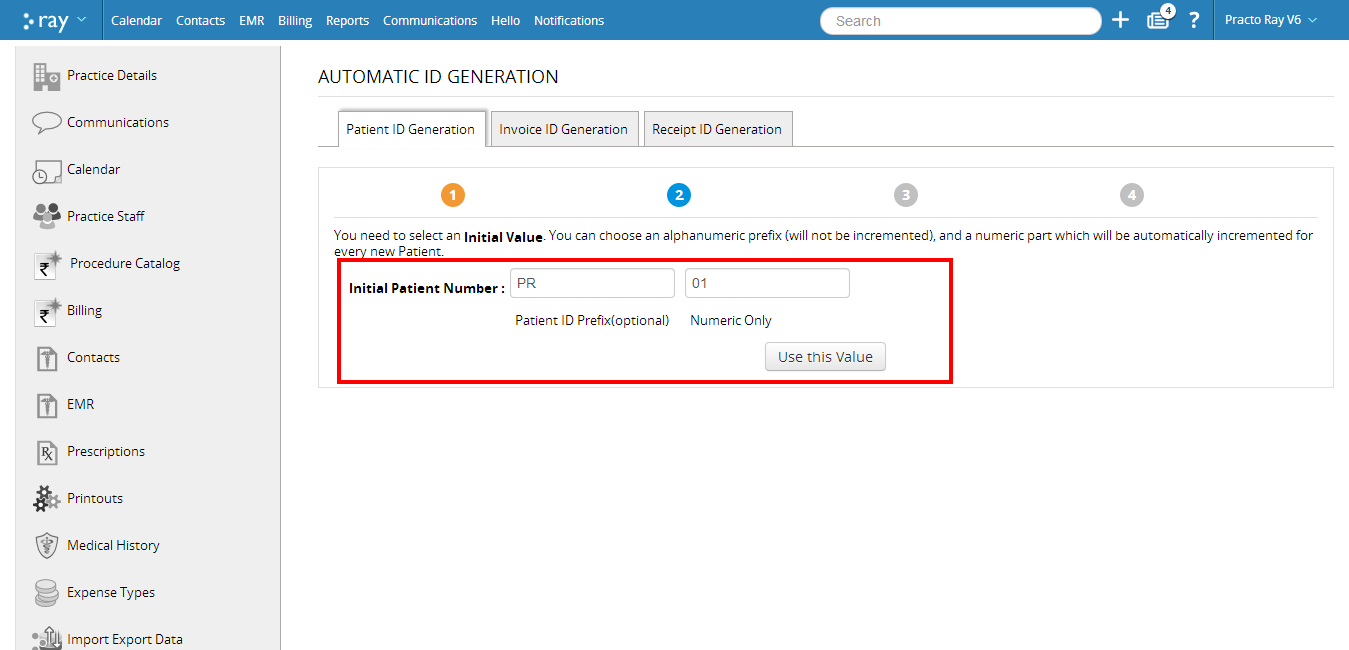
This will prompt you to select an initial value that will then be incremented for every subsequent patient there on. You also have the option to assign a constant prefix that will automatically be part of every bill number. Choosing a prefix helps you to maintain a level of uniformity for all your records. A prefix once chosen, will remain the same for all patients and only the numeric value will be automatically incremented for every new patient.
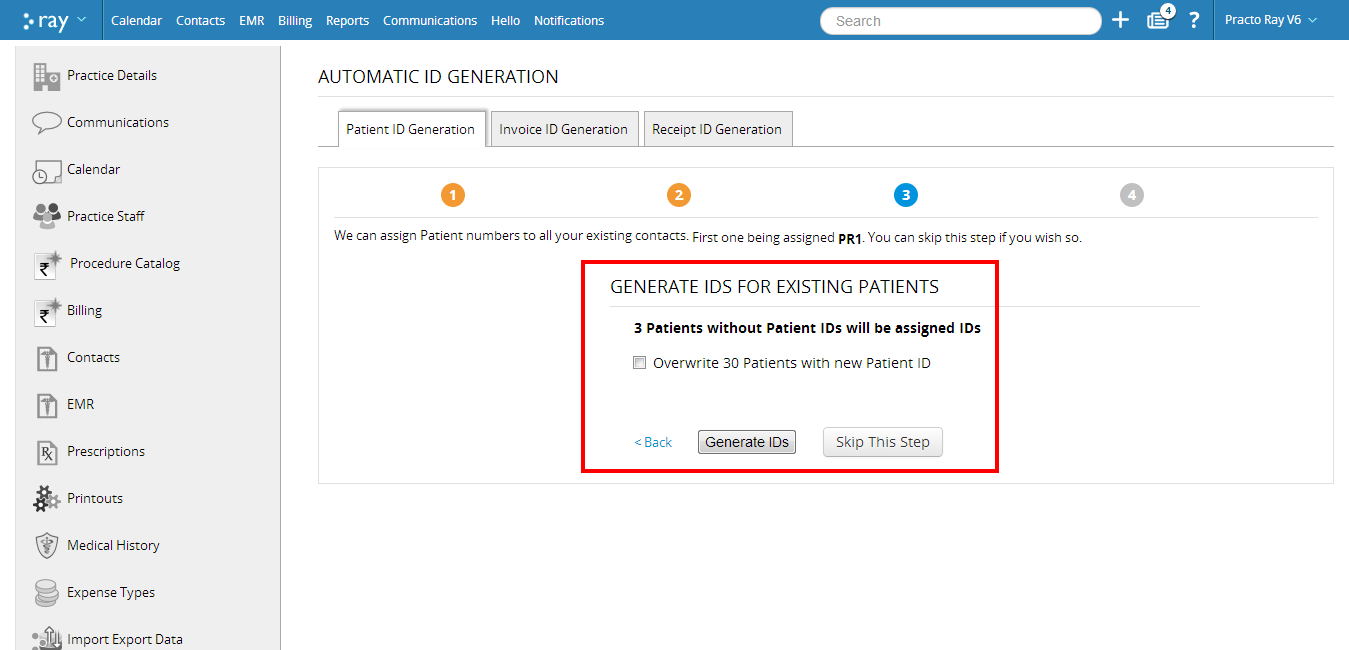
You will be asked whether or not you would like to have ID’s generated for all your existing patients. You can either go ahead and generate the ID’s or you can skip the step.
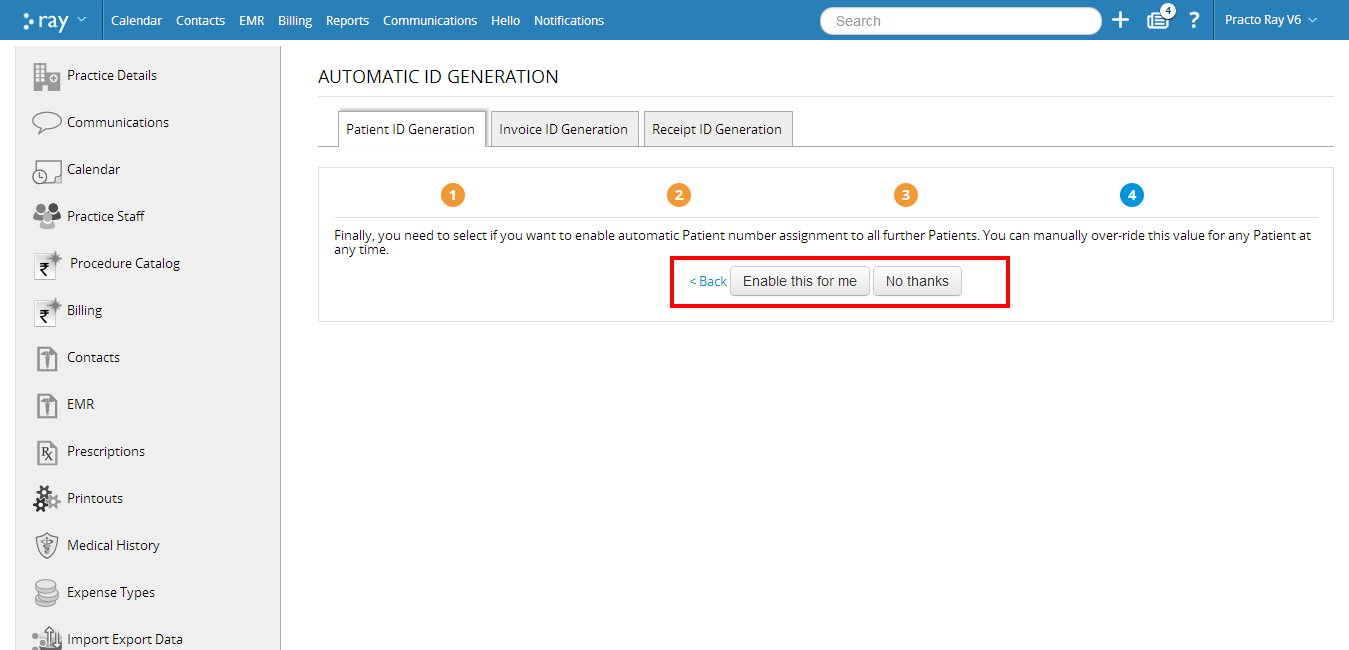
At the final step, you can decide whether or not you are sure about enabling the function. If so, go ahead and click on ‘Enable’.
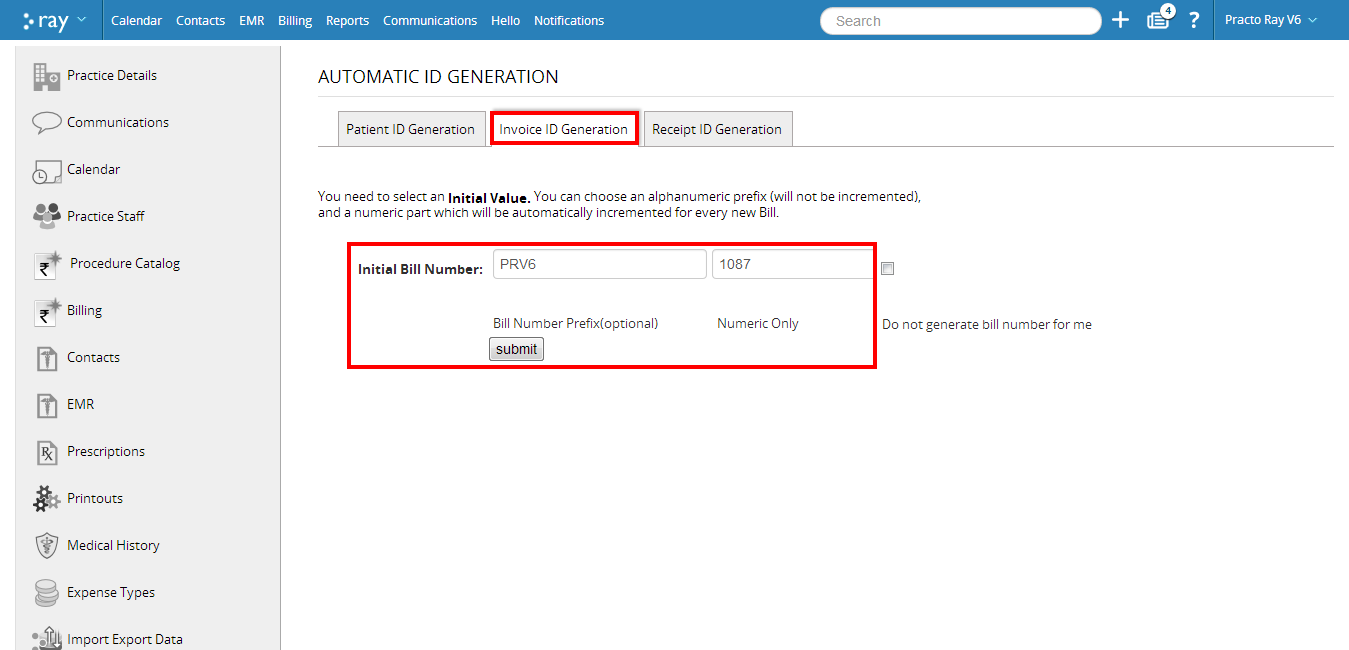
Activating Invoice ID:
To activate automatic Invoice ID generation, click on the tab ‘Invoice ID Generation’. This will prompt you to select an initial value that will be then incremented with every new patient. You can choose a prefix that will remain the same for every bill and the subsequent bill number will be automatically incremented for every new bill
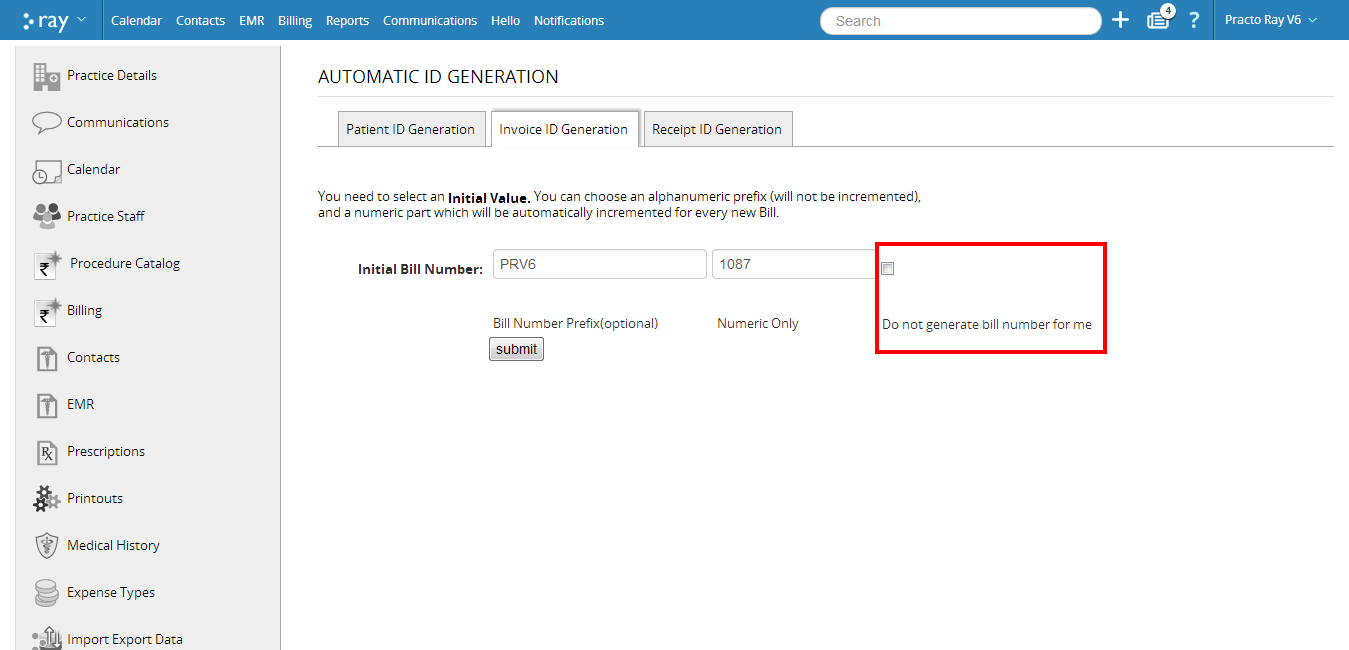
. In case you do not want invoice ID’s generated for your patients, you can uncheck the option ‘Do not generate bill number for me’.
Activating Receipt ID:
To activate automatic Receipt ID generation, click on the tab ‘Receipt ID Generation’. This will prompt you to select an initial value that will be then incremented with every new patient. You can choose a prefix that will remain the same for every receipt and the subsequent receipt number will be automatically incremented for every new receipt.

In case you do not want receipt ID’s generated for your patients, you can uncheck the option ‘Do not generate receipt number for me’.
